
It has been a while since I have made a blog post. I set the goal to blog once a week but the pandemic has me struggling to keep up with all the things I juggle. I also just feel more tired and just not as motivated. But here I am attempting to push myself and get out a post. To be honest, this was the perfect thing as it was pretty therapeutic for me.
So I want to start out by disclosing that as of now, I am an affiliate partner for Sola Wood Flowers. I have worked with them before for just a collaboration and I am so happy for this opportunity to be an affiliate as their flowers are literally the best thing ever created! They are wood flowers but they feel & look like real flowers and the best part…they last forever. Do not get me wrong, I love real flowers and plants, but sometimes you just want something that will last longer. If you do make a purchase, if you can please use my affiliate link, I would appreciate it. I get a small commission every-time you make a purchase and every-time I see a purchase or a link click, I will legit be over here doing a happy dance. I truly appreciate your support. The link is here and throughout the rest of this post .

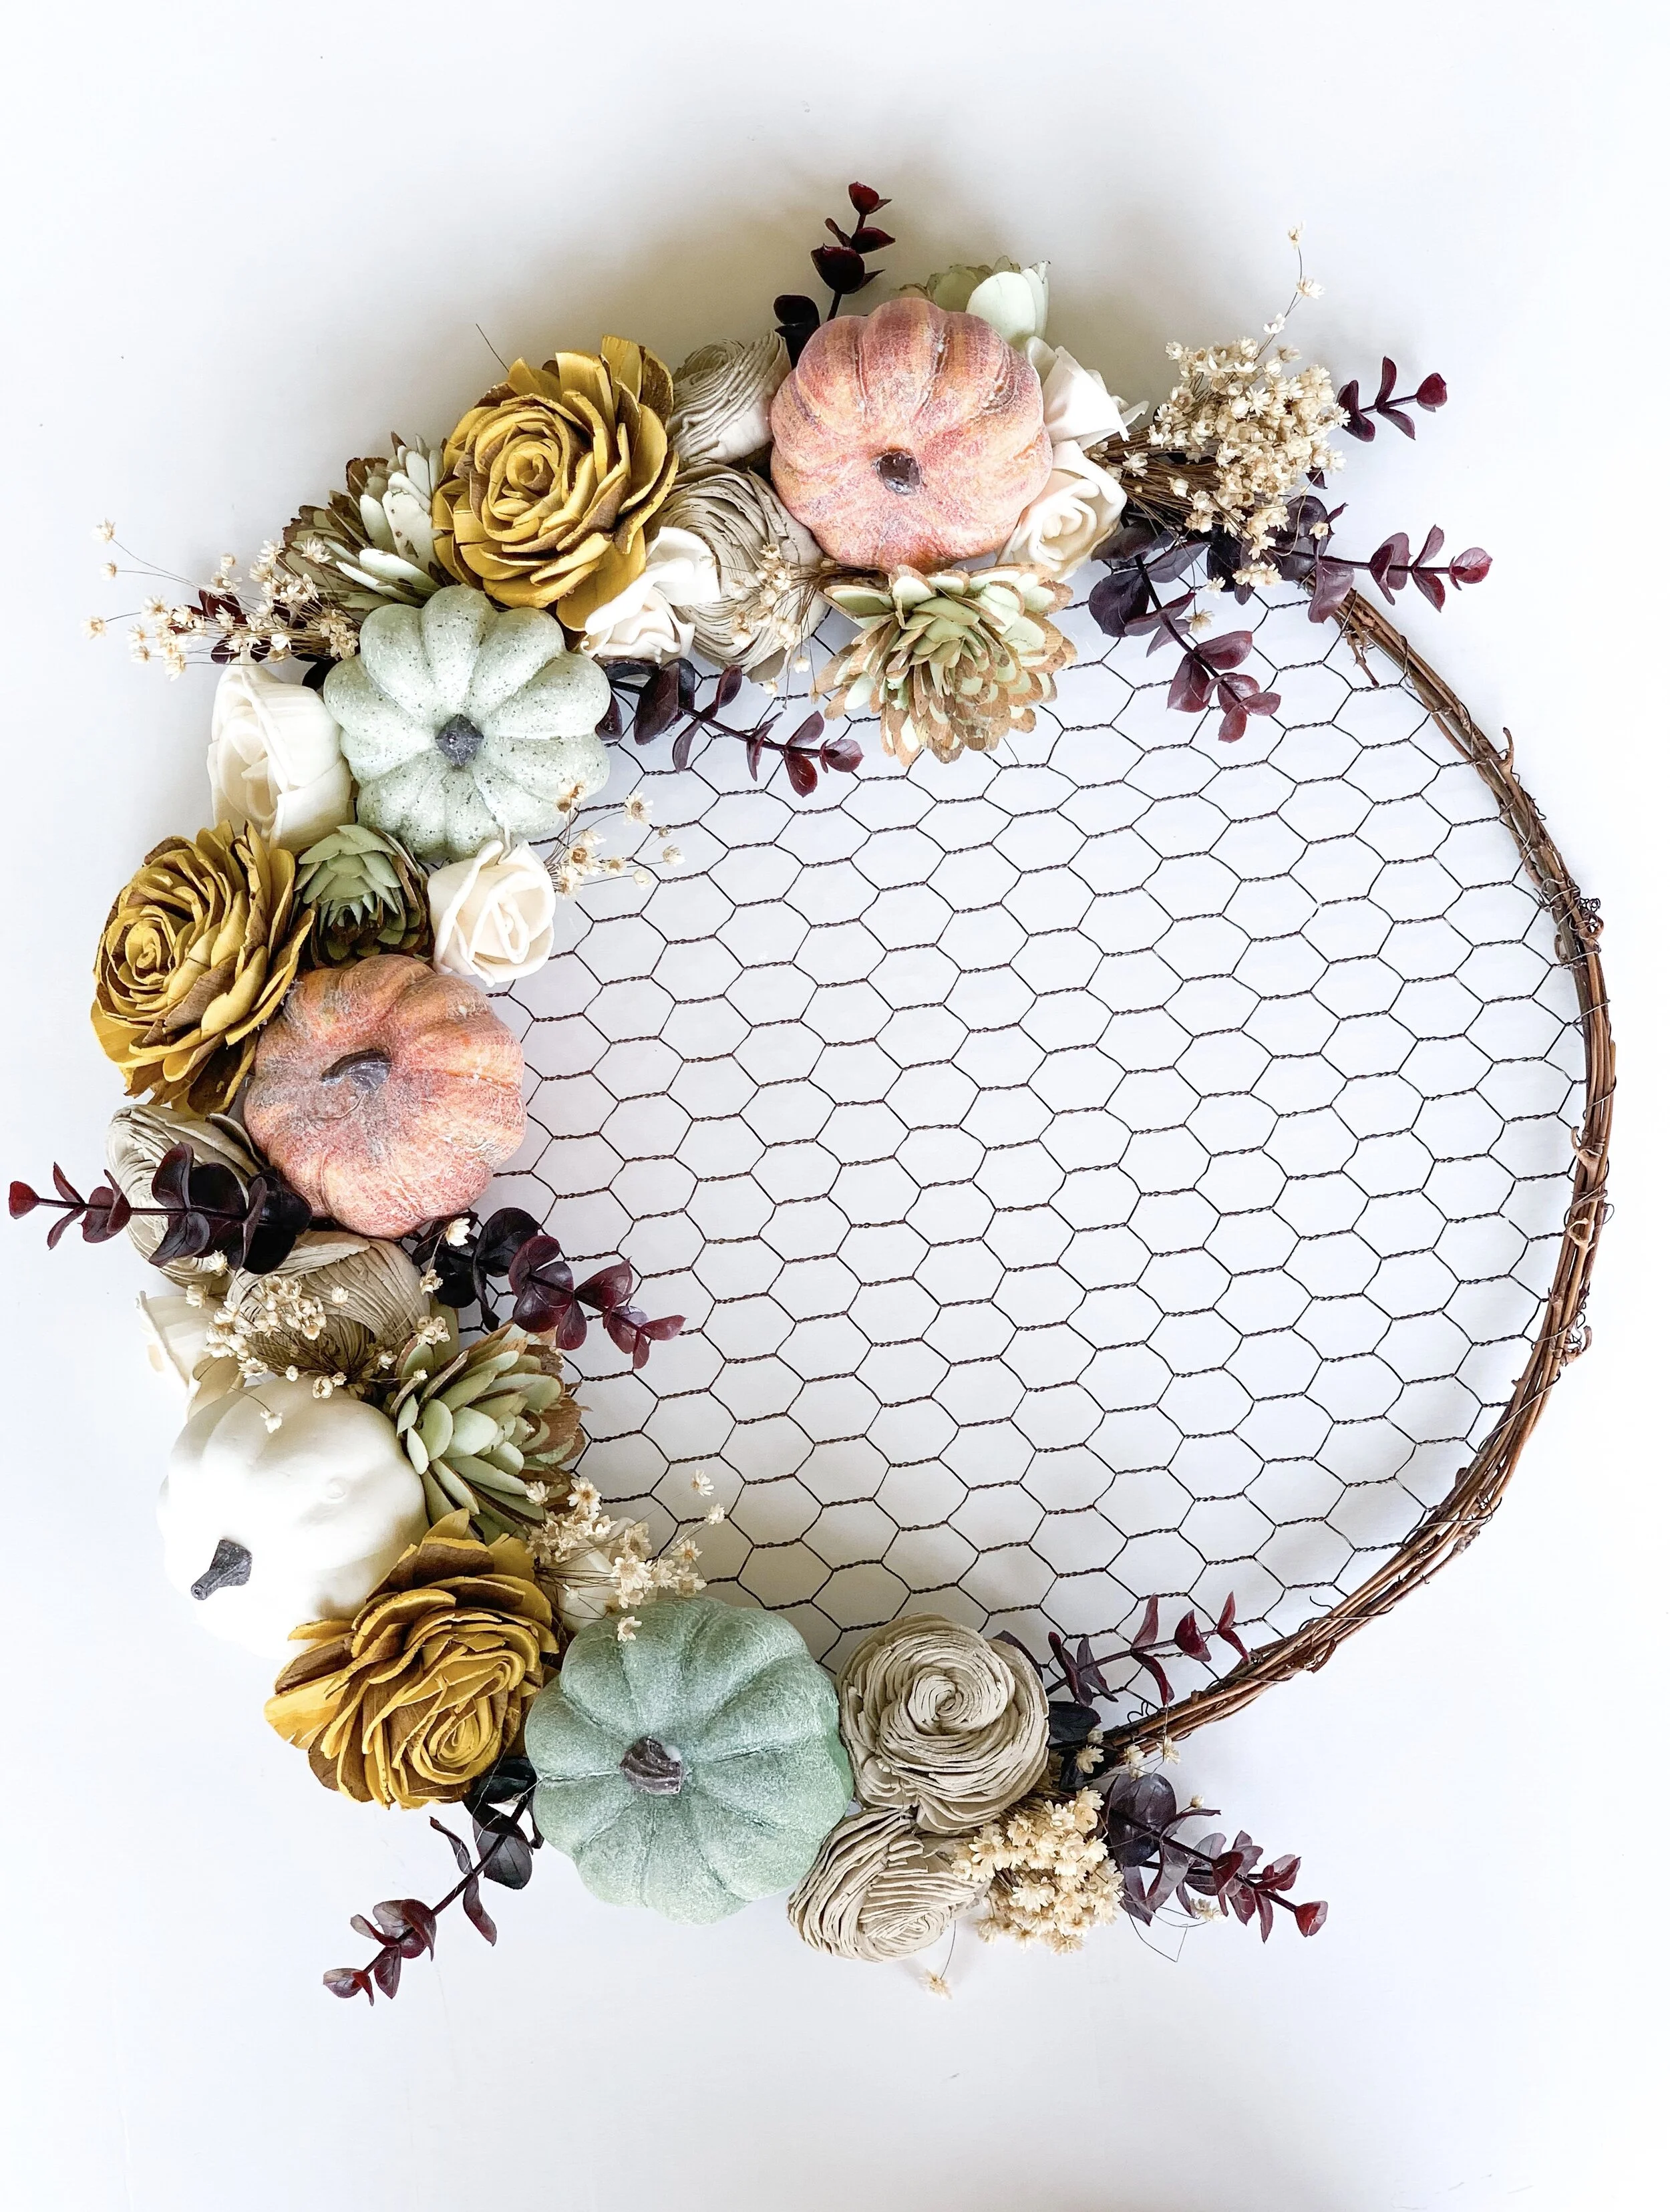
I am sharing my twist of the chicken wire wreath using the Sola Flower Chicken Wire Wreath Kit. Let me preface that I ordered an extra pack of flowers not realizing they are included in the kit, as are the fillers. I am glad I did because I wanted to add more colors that go with my home decor. The ones that come with the kit are the ones featured in the kit photo as seen on their website. They are a neutral color which is nice too. You get everything you need in the kit so no need to add extra unless you want to. I also picked up some pumpkins that were 40% off at Hobby Lobby.
Here is what you need:
Wire cutter (optional)
Scissors
Rubber Band (optional)
Hot glue gun (the stick came with an extra large glue stick but I have a small glue gun)
Phone/Camera

The extra kits I got are listed below and you can search for them on the site:
Butter Mint Assortment - 25 pack (on sale for $12 at time of purchase)
Eucalyptus Pick - Burgundy (on sale for $3.20 at time of purchase)
Note: If you cannot find either, they may be sold-out, but keep checking back or choose from one of their many other amazing items.
First I recommend placing everything on the chicken wire.
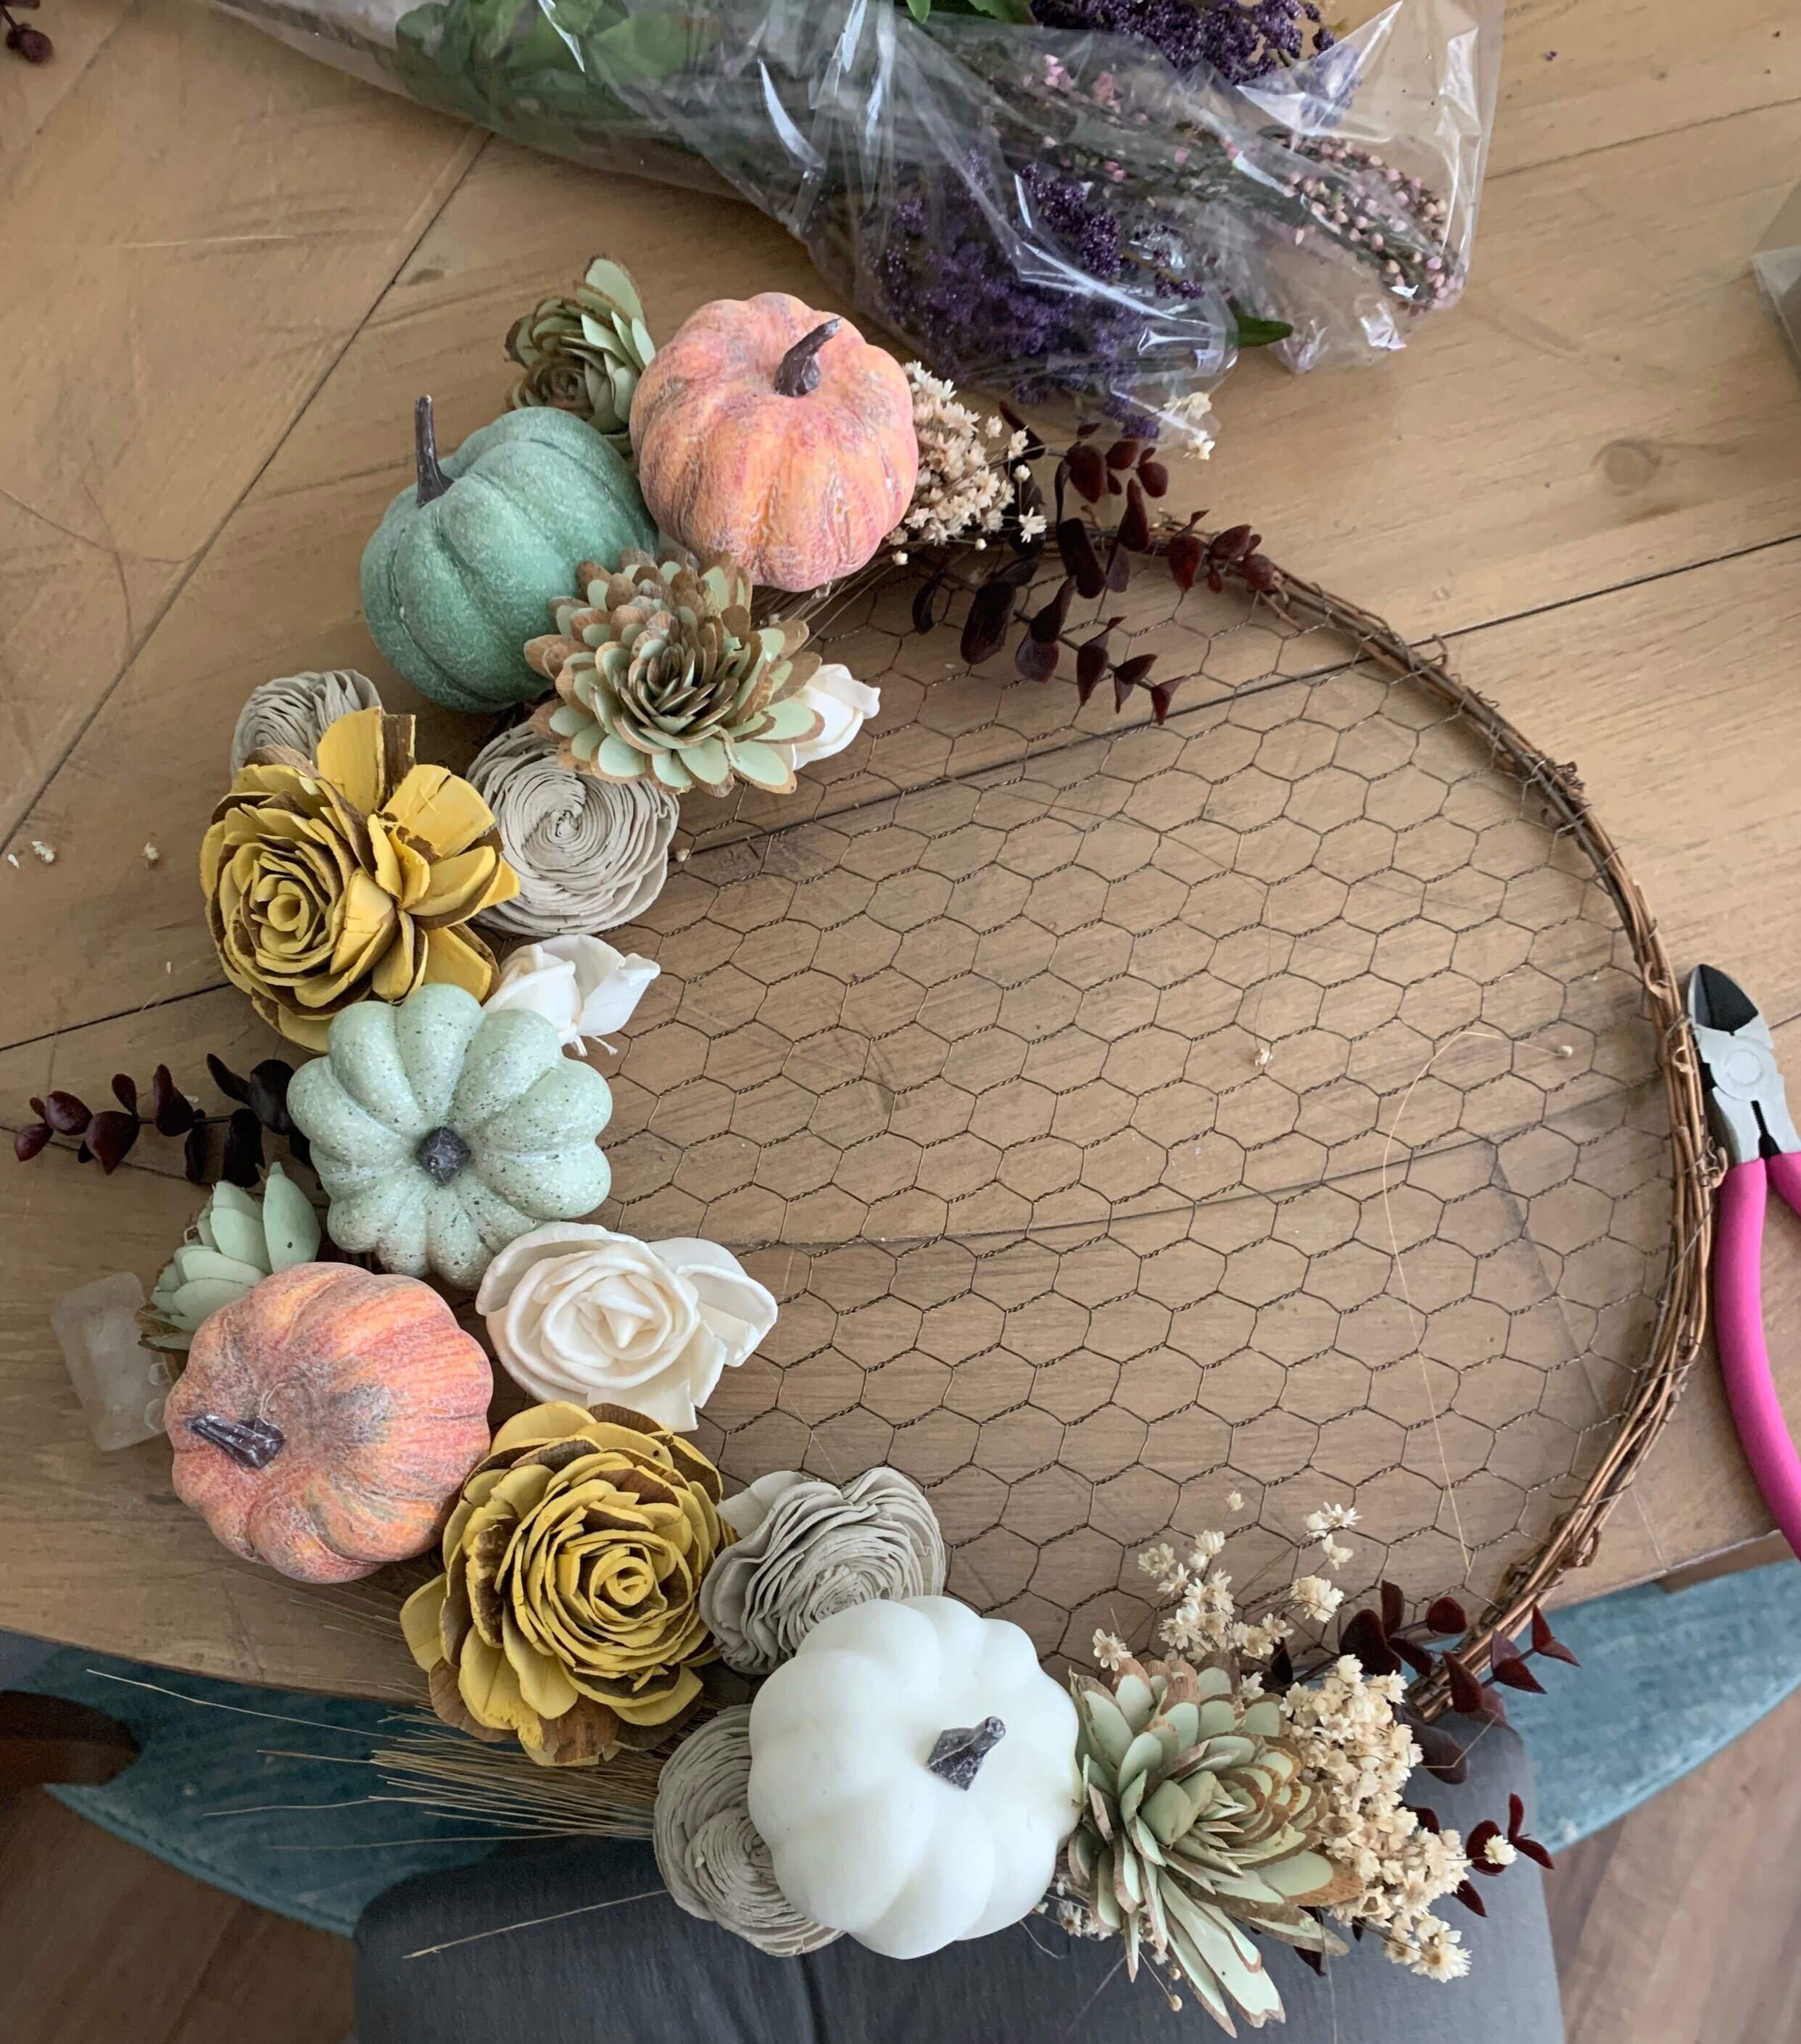
When you have it where you want, take a picture so you can use as reference.
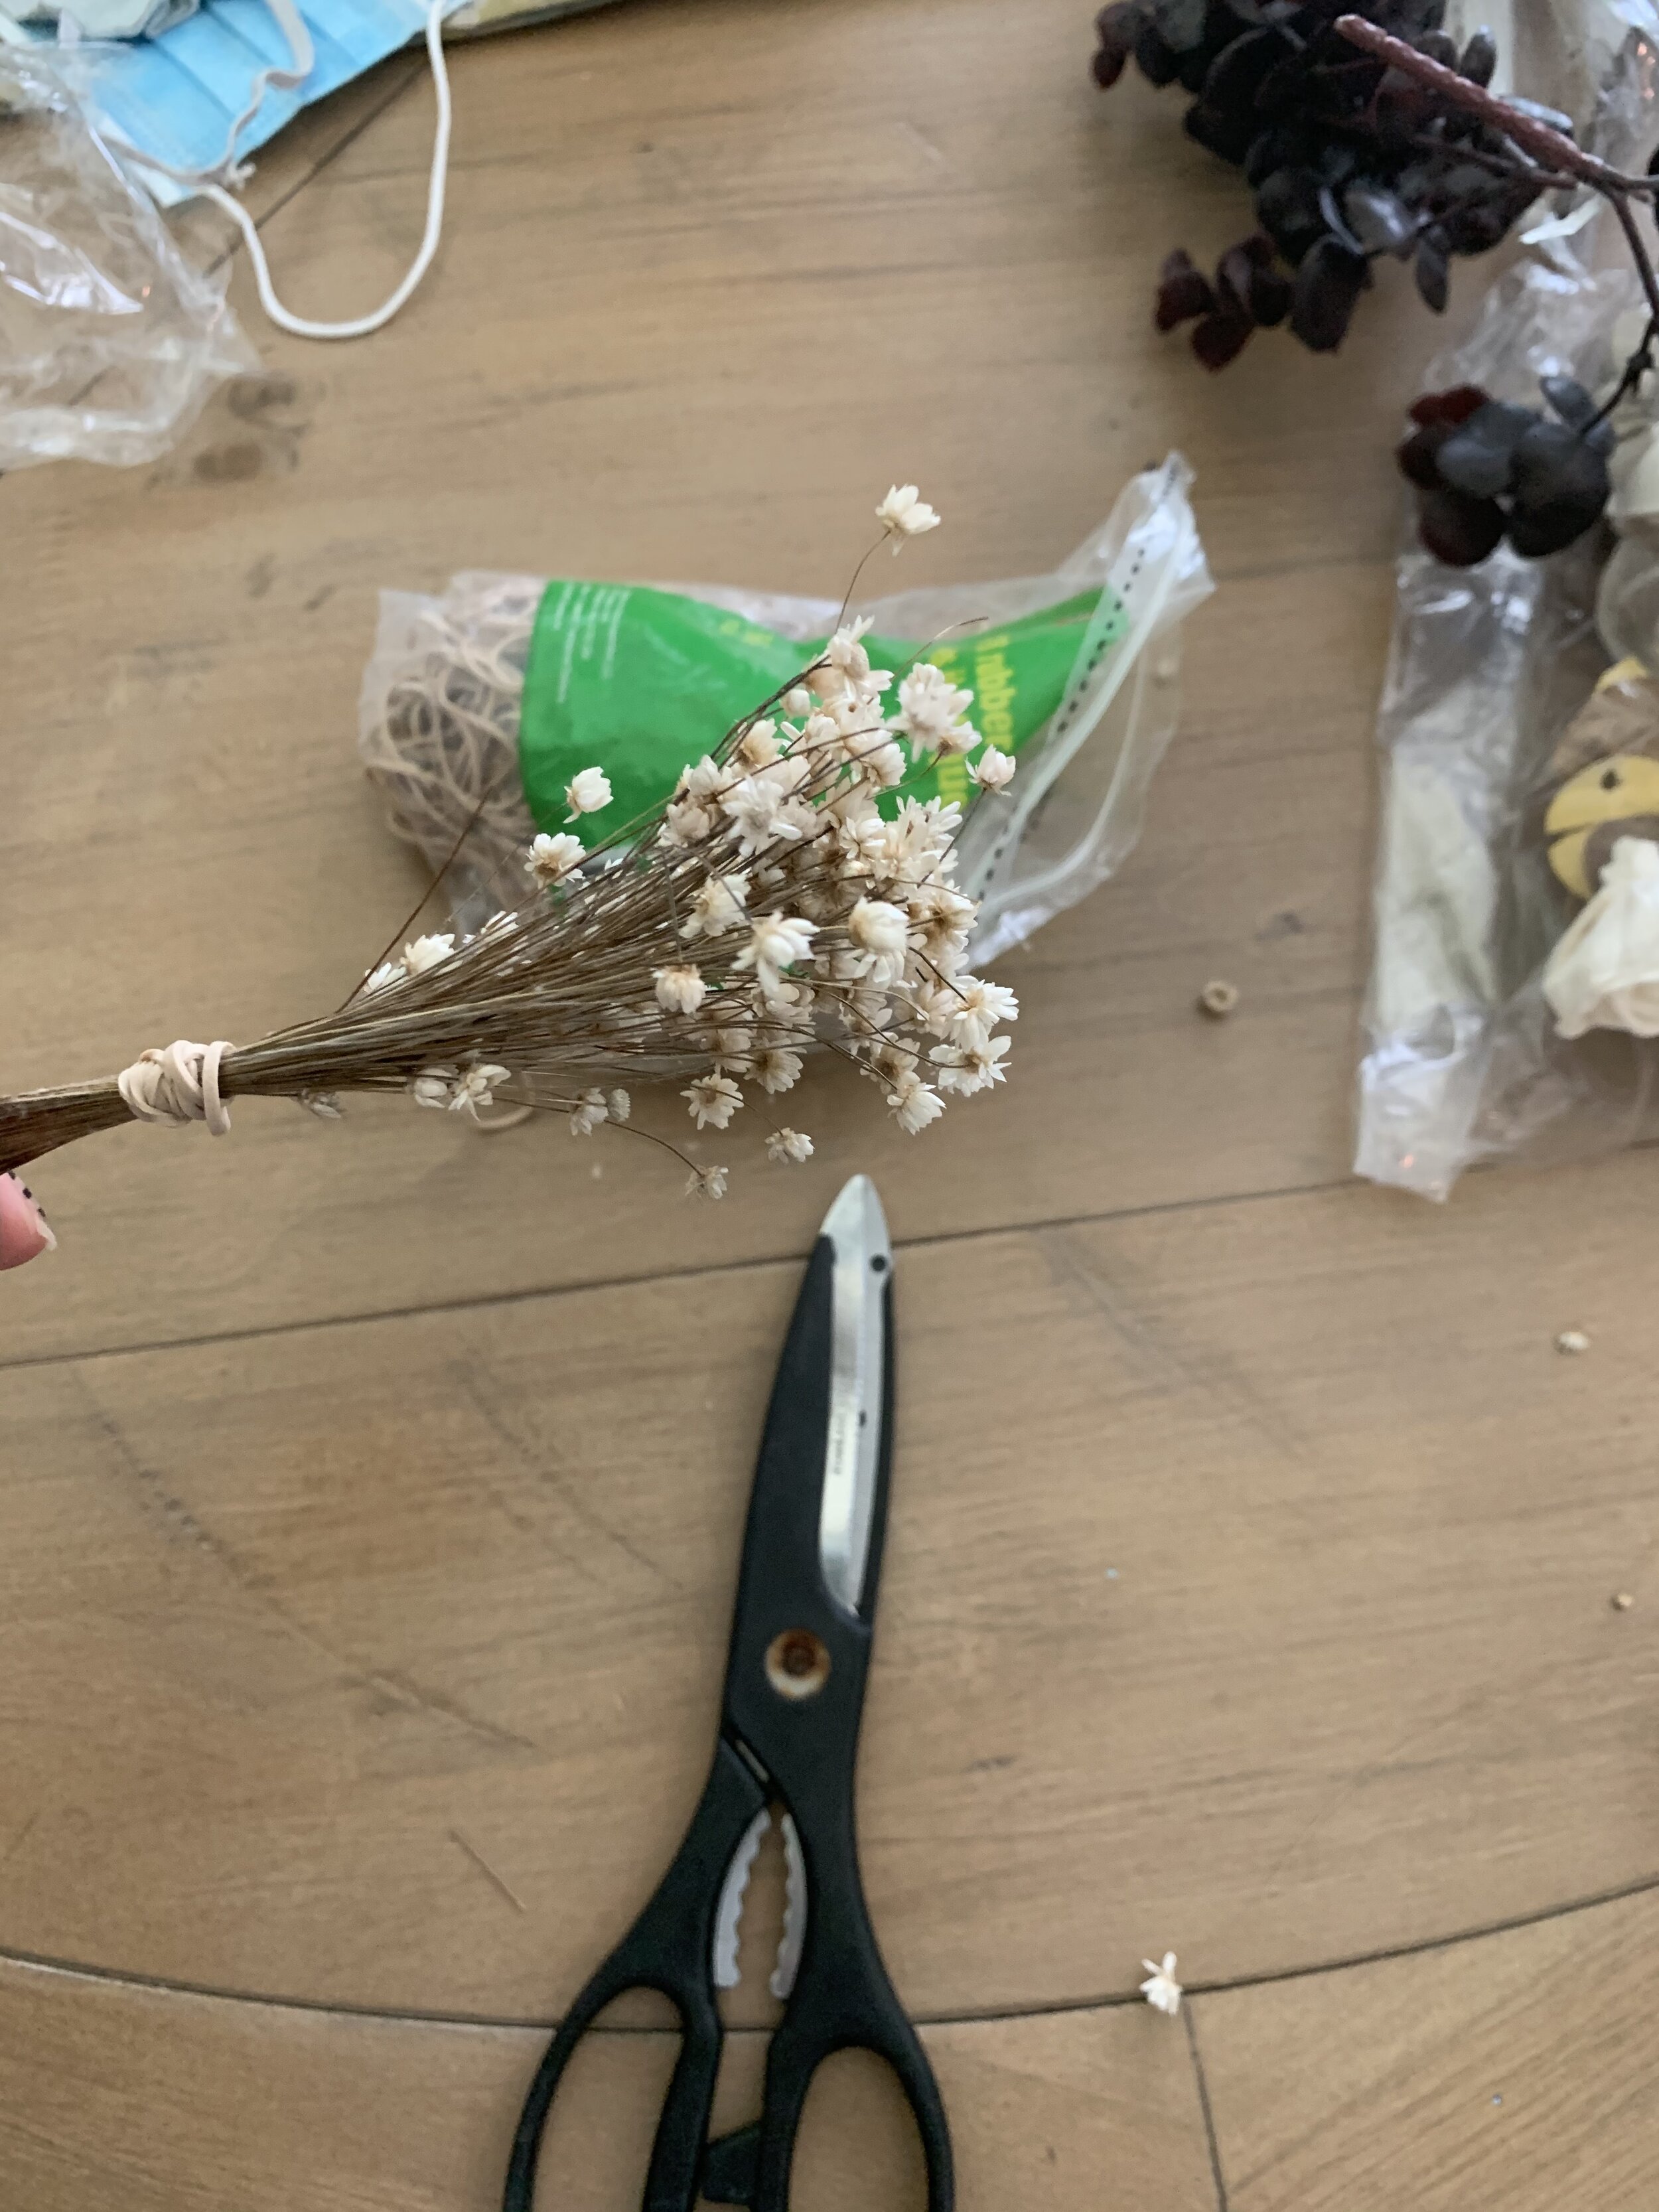
I worked from the eucalyptus (dark purple filler) on each side first then started from top to bottom. With the filler, I tied it together using a rubber-band, then cut it. I kept it bunched together and glued it on that way. Then I spread the flowers apart.
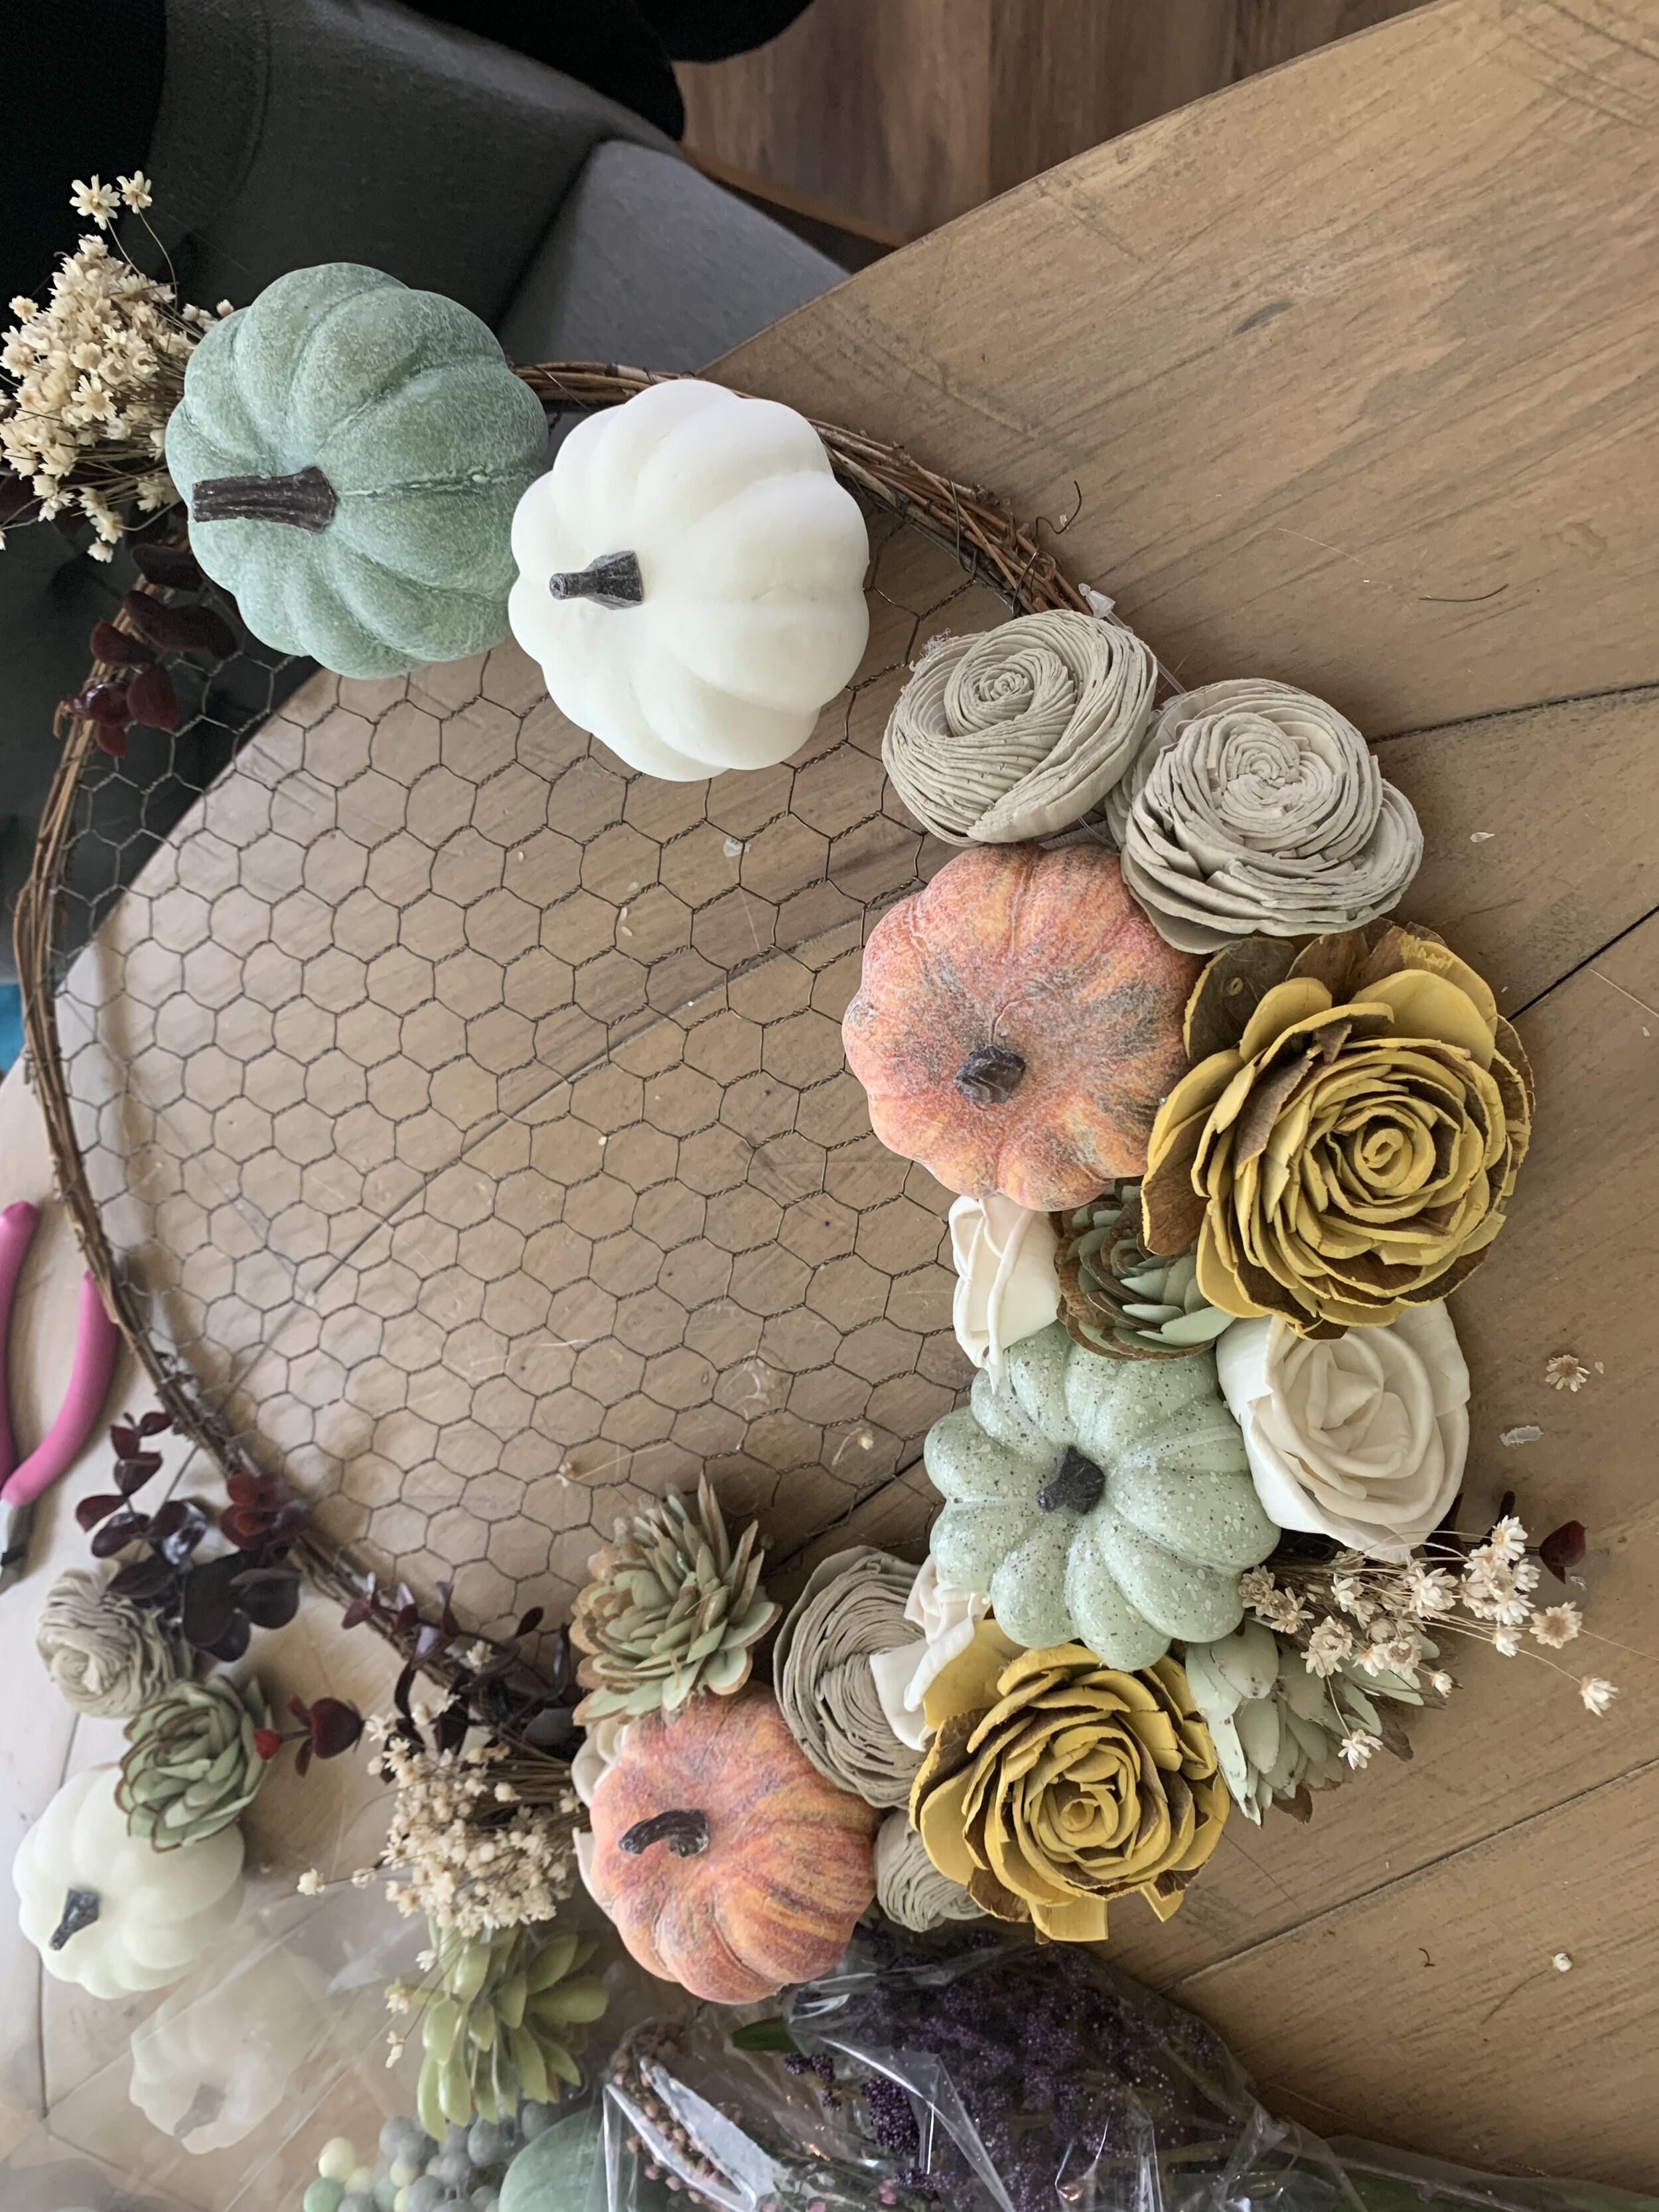
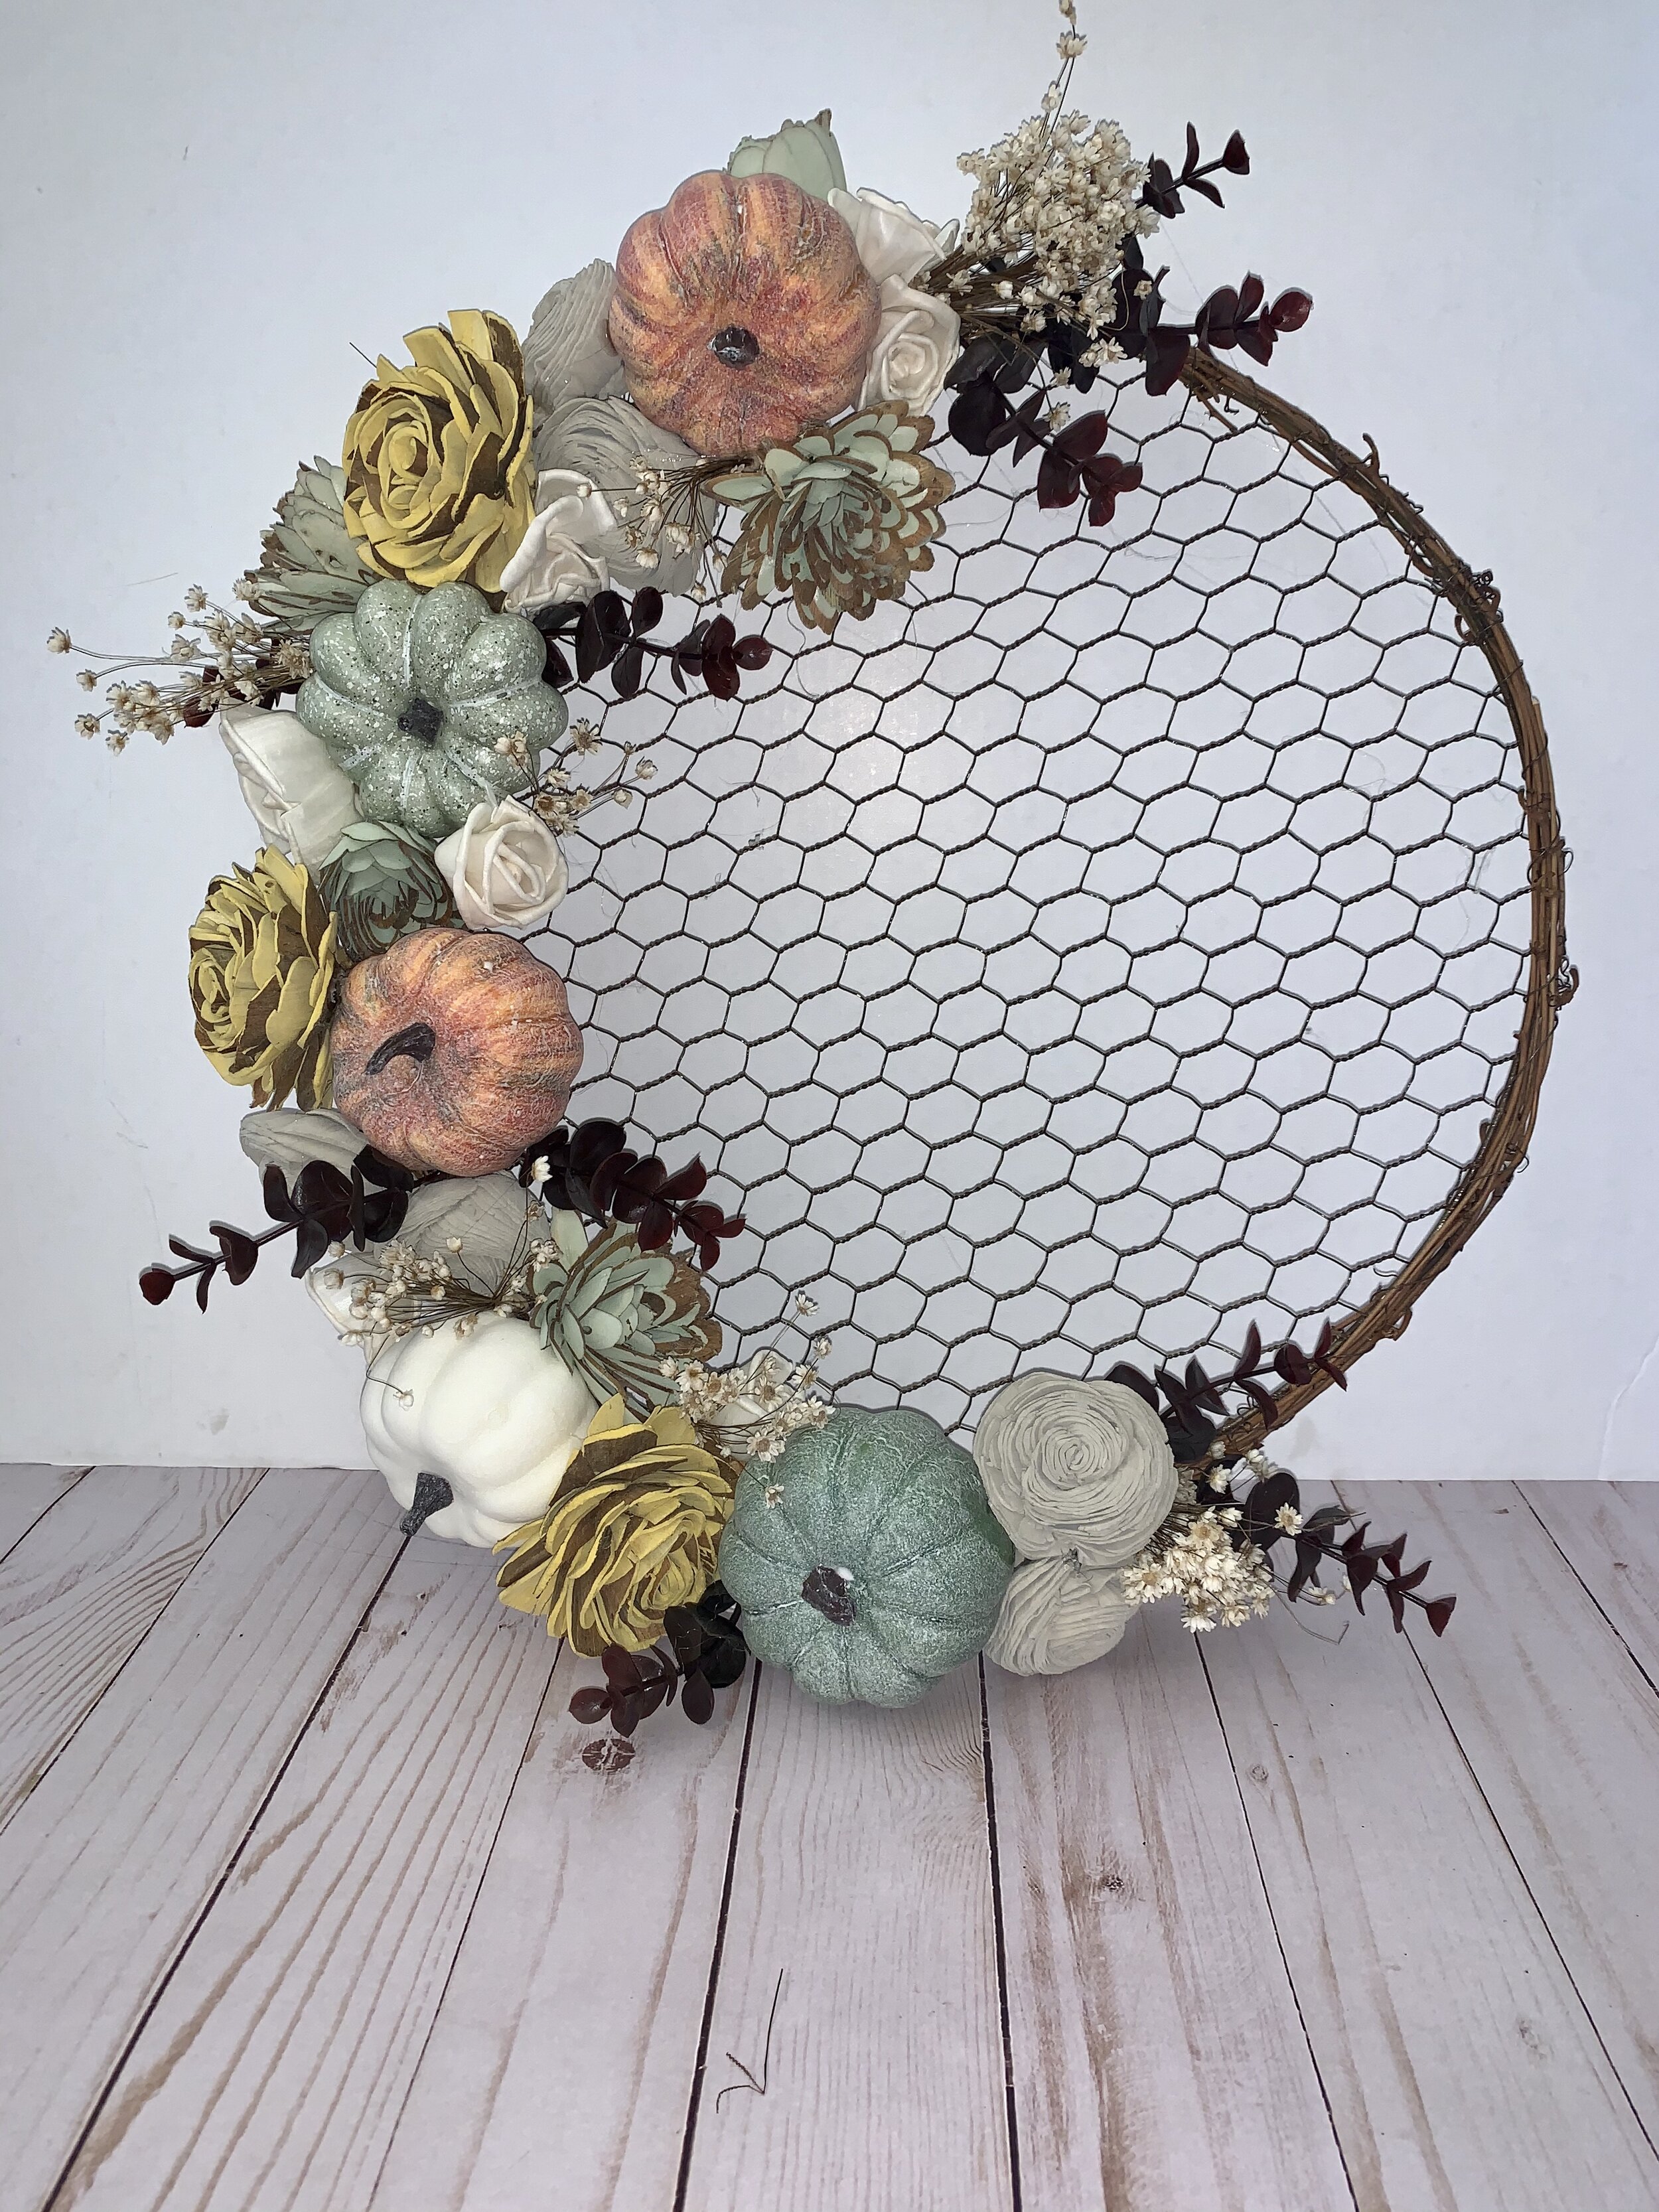
Once everything is glued down, check for gaps and add the filler in those spots. When it is to your liking, enjoy your masterpiece! If you plan to put it outside, make sure you use extra glue in the event it gets rainy and windy. I found a cute place inside for mine.
There was no real method to my posting. I had a few pieces that I knew I wanted, for instance at least 3 of the yellow flowers and at least 4 pumpkins. Of the pumpkins, I wanted to ensure at least 2 matched. I am usually a symetrical person but working to let that go!
If you do one and decide to post it on IG, tag me please, @ashlillyotm or send it to me on Pinterest. I cannot wait to see it.
This was so relaxing and the flowers are so beautiful that it is hard to mess it up. So do this with confidence!
As always, thank you for reading!! XoXo
