Have you seen those adorable fairy gardens? If not, definitely google them. They are so cute and I always wanted to make one. The thing is, my son is totally not interested in them. I may still make one, one day, but wanted to figure out a way to make it work for the both us.
*Cue the dino garden*
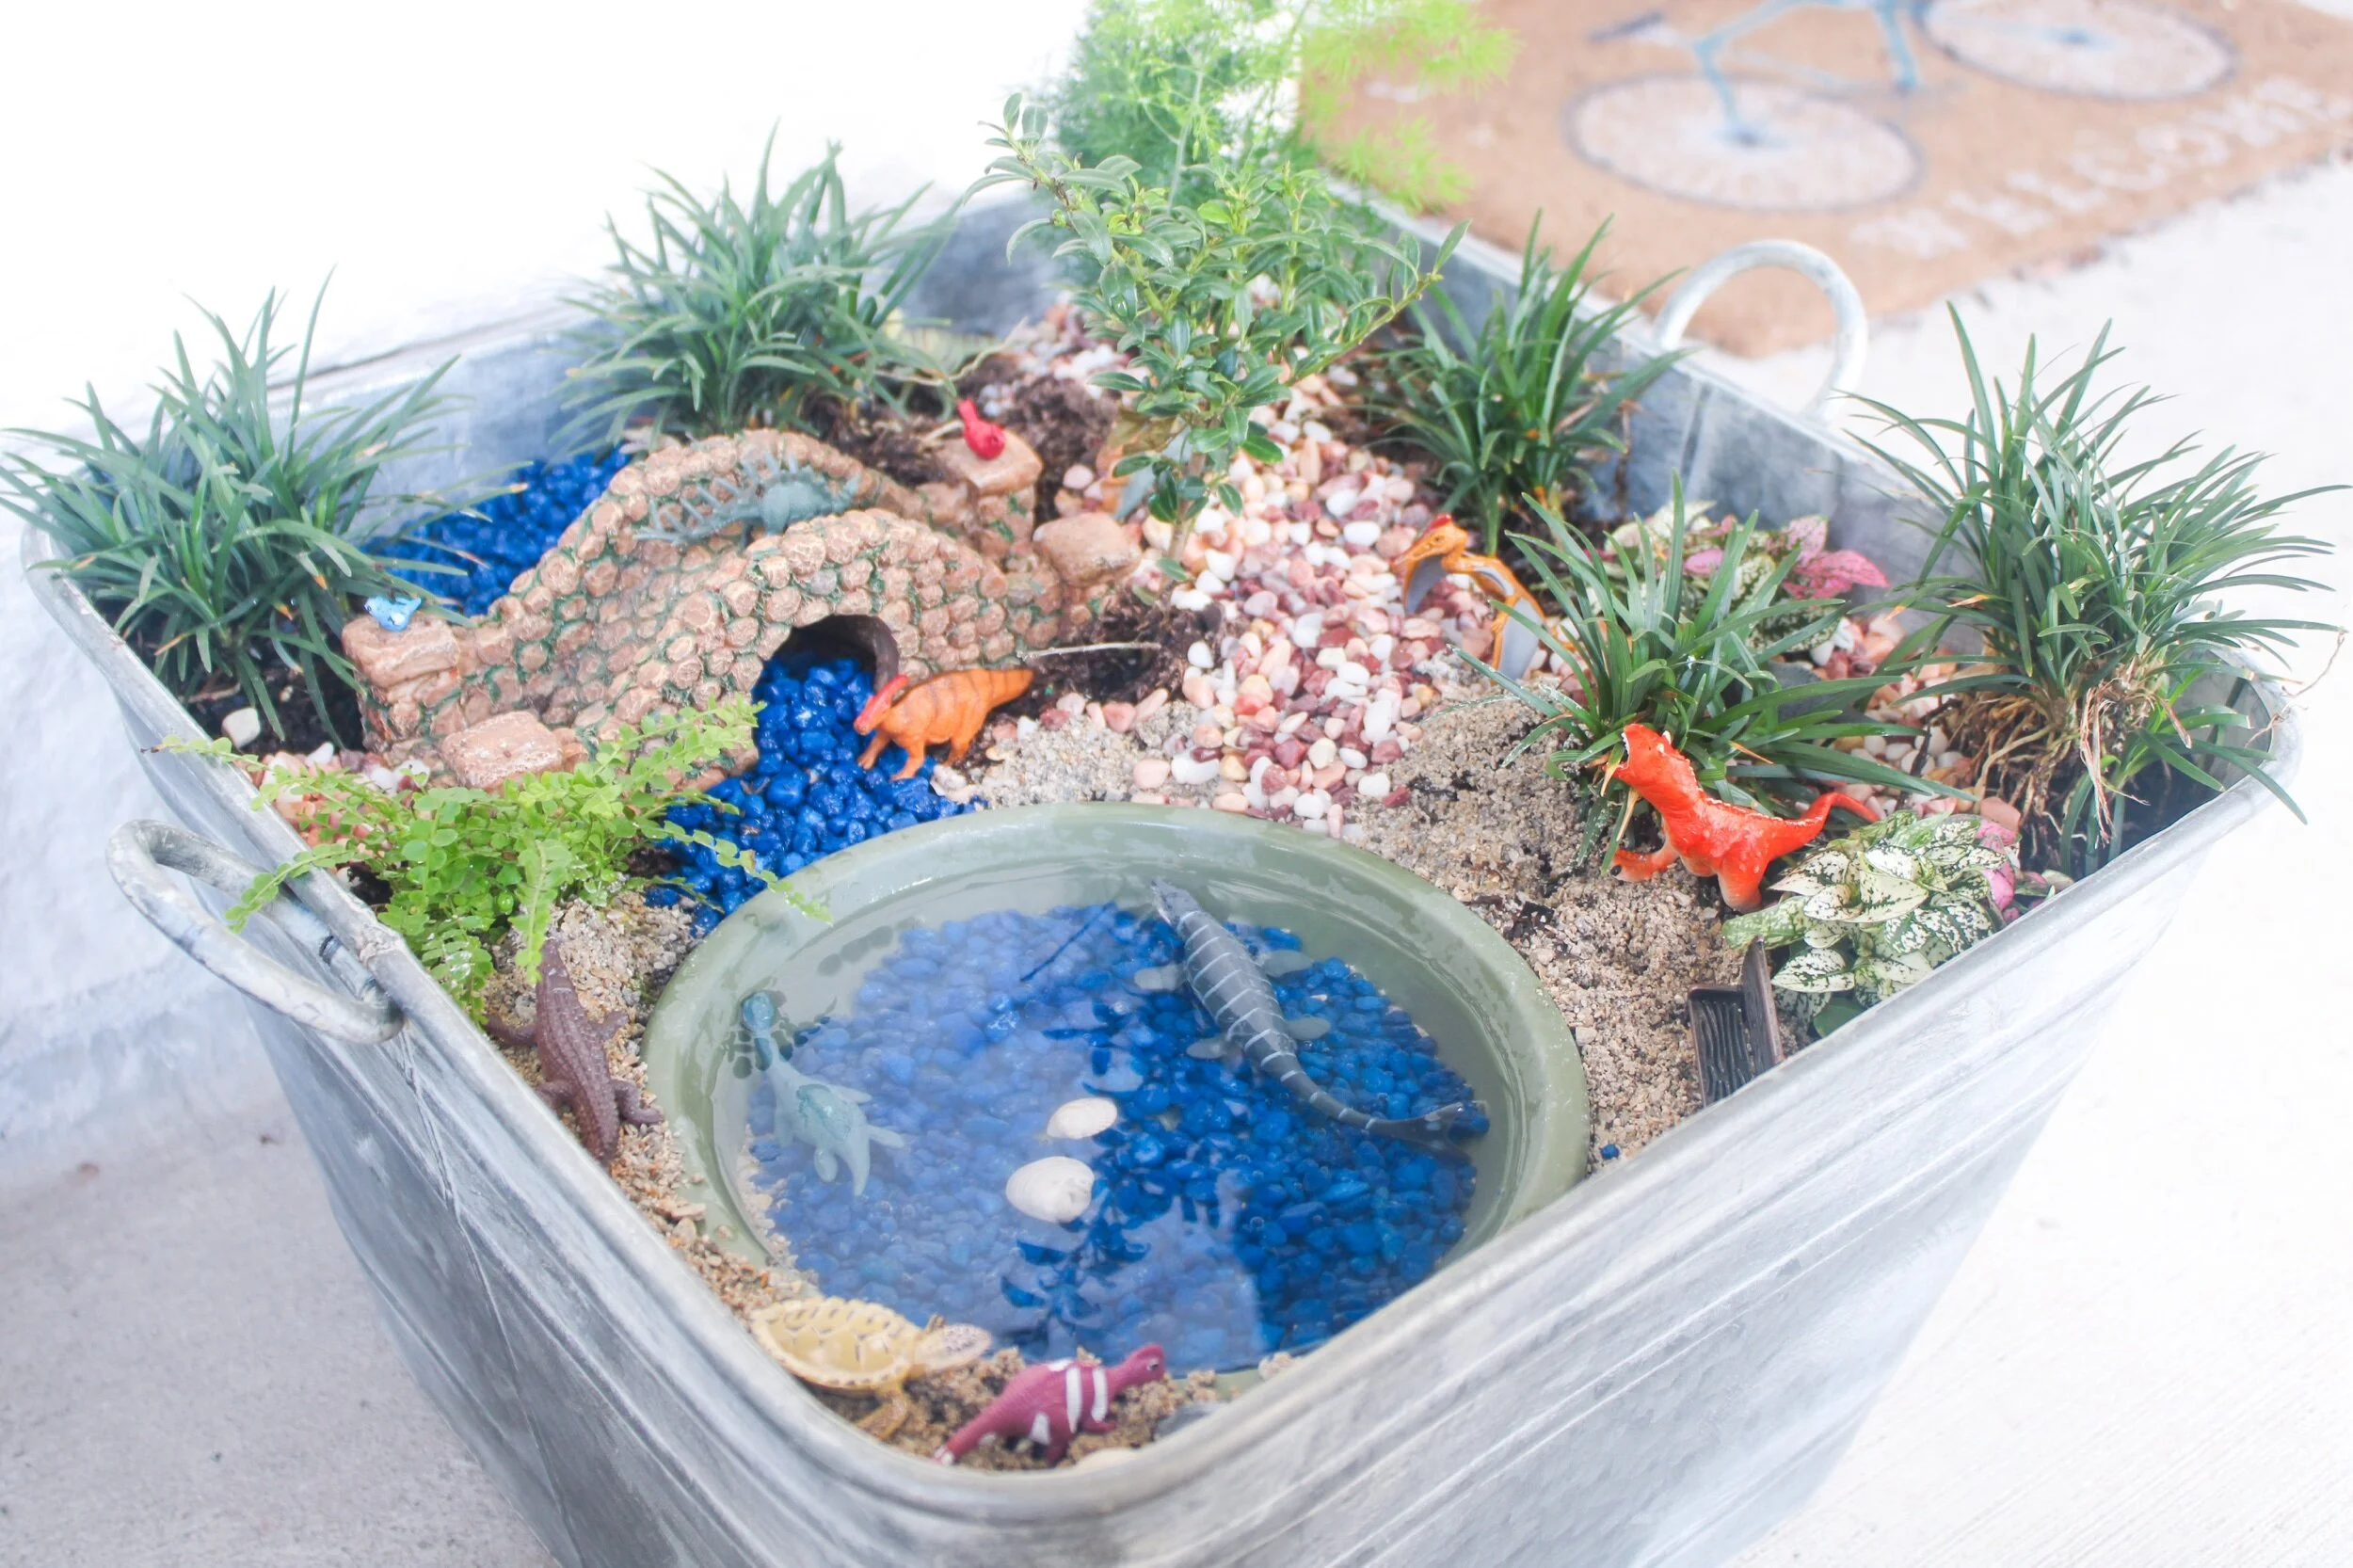
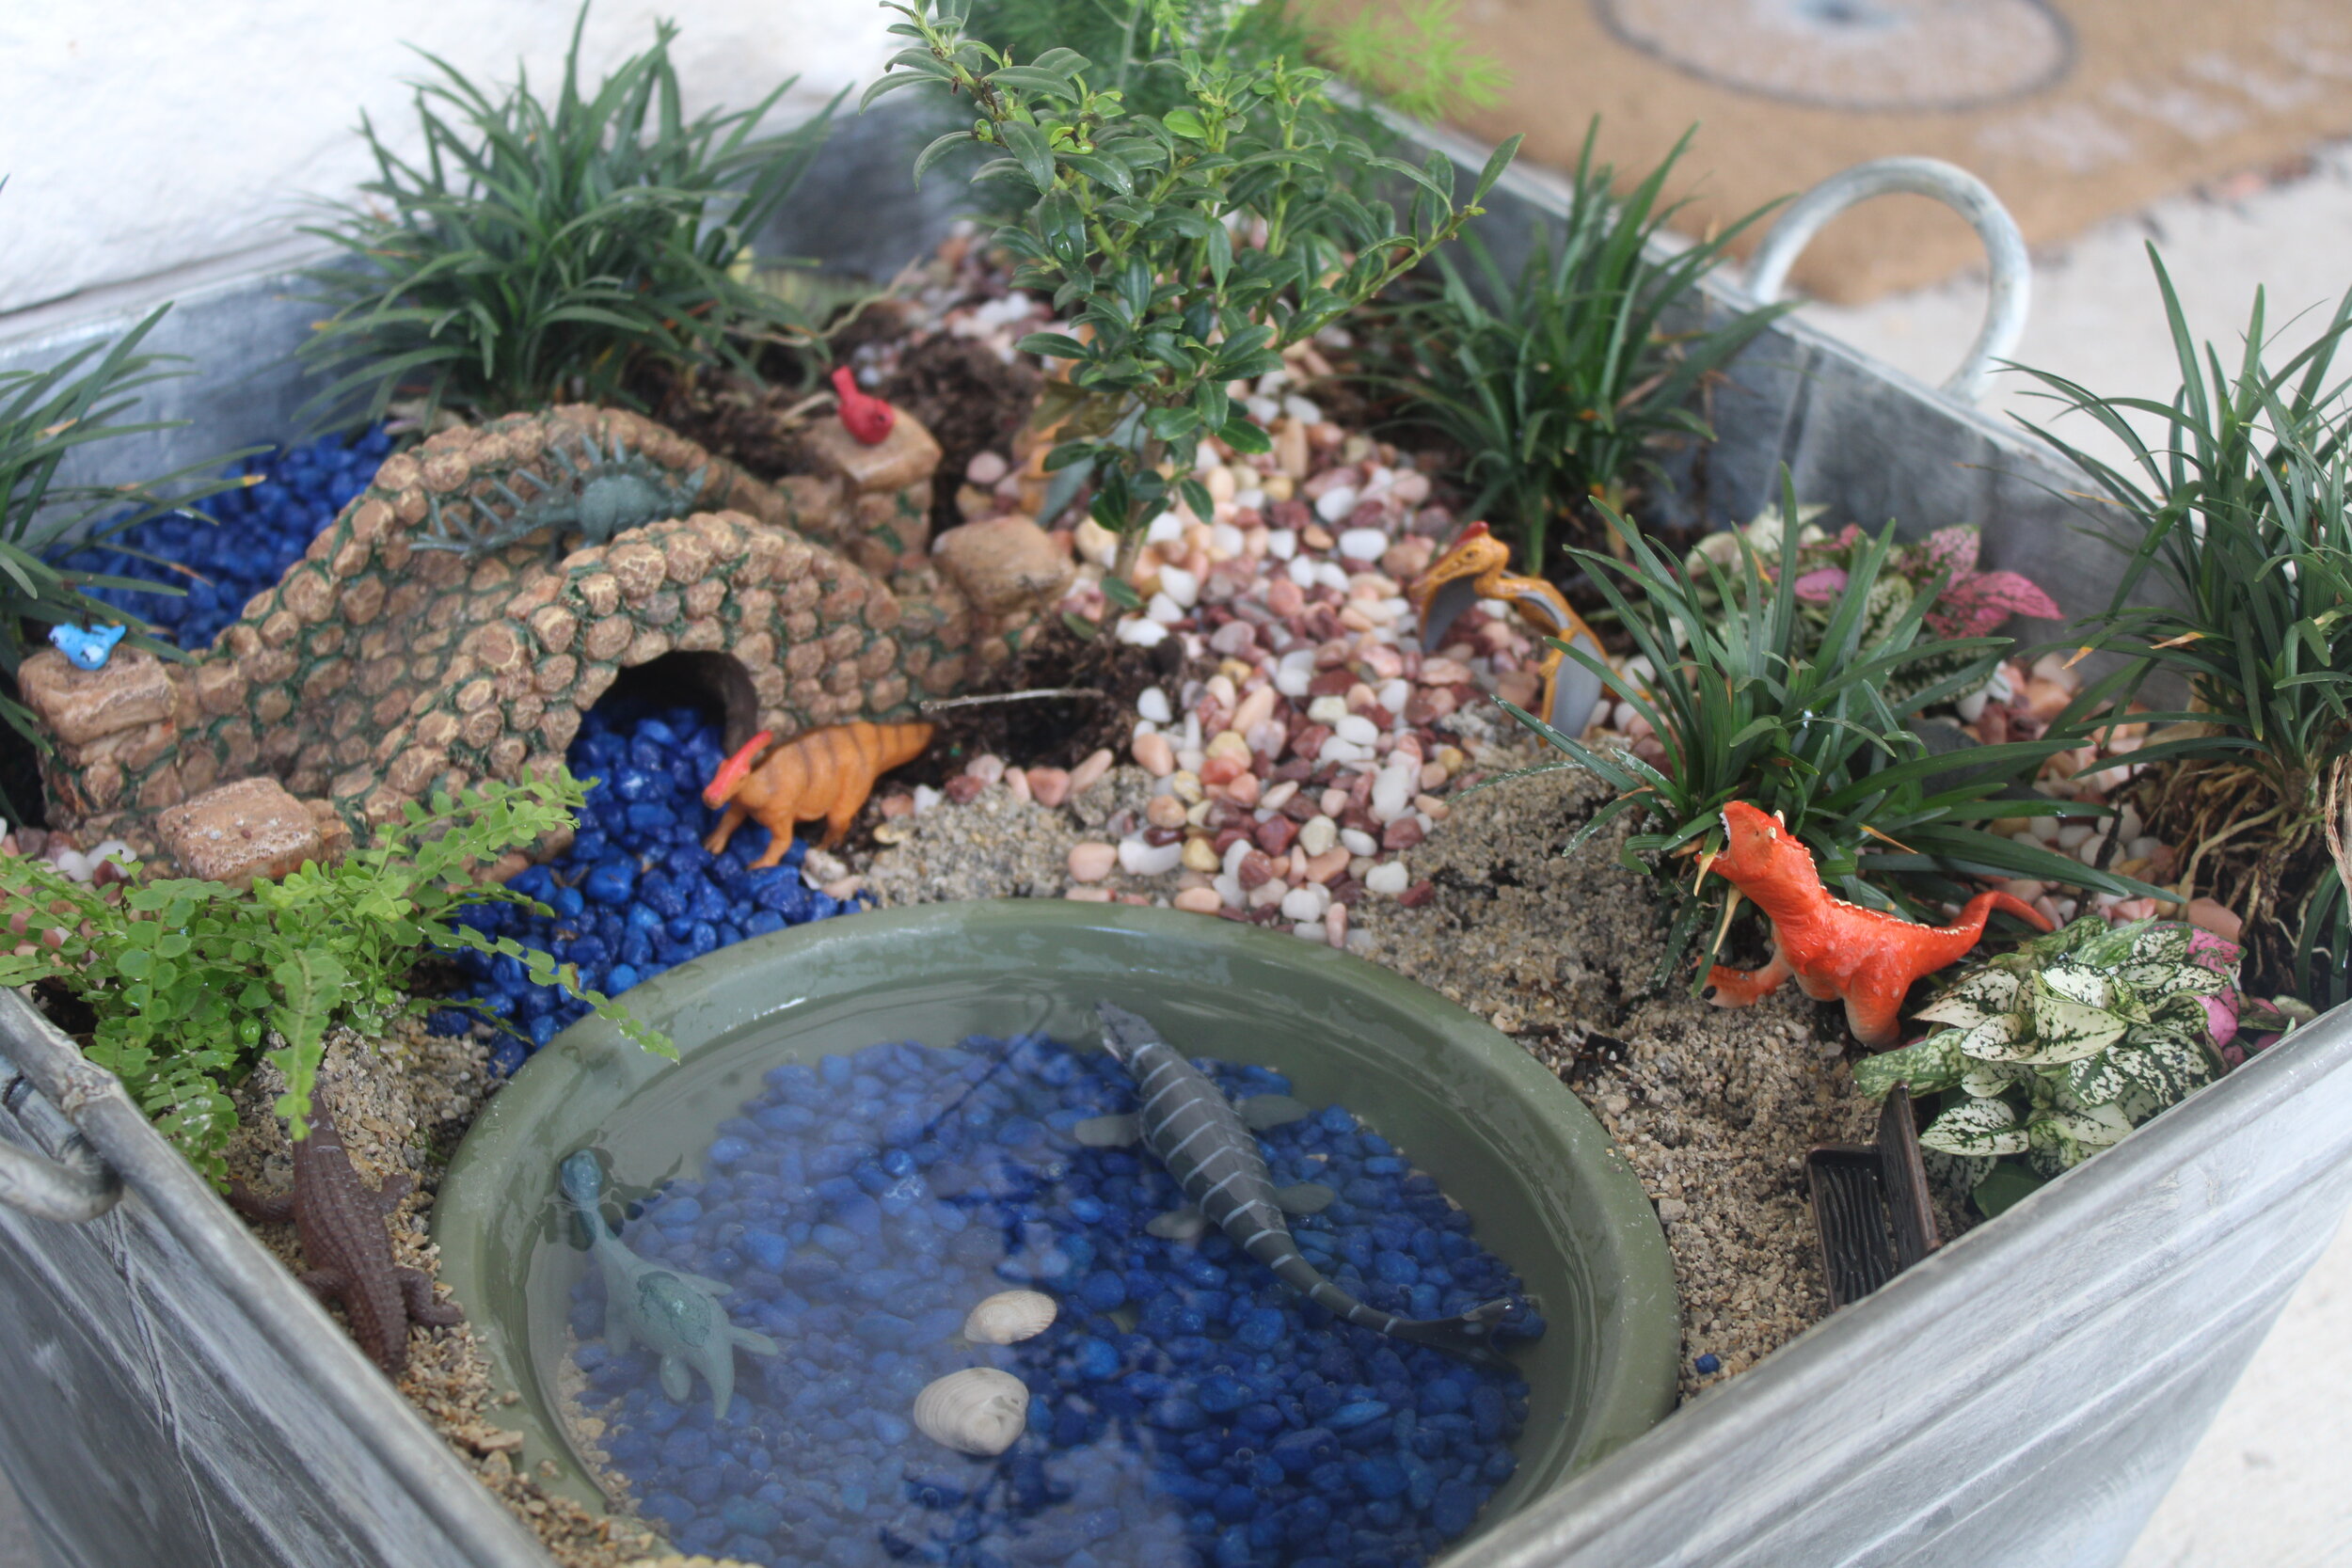
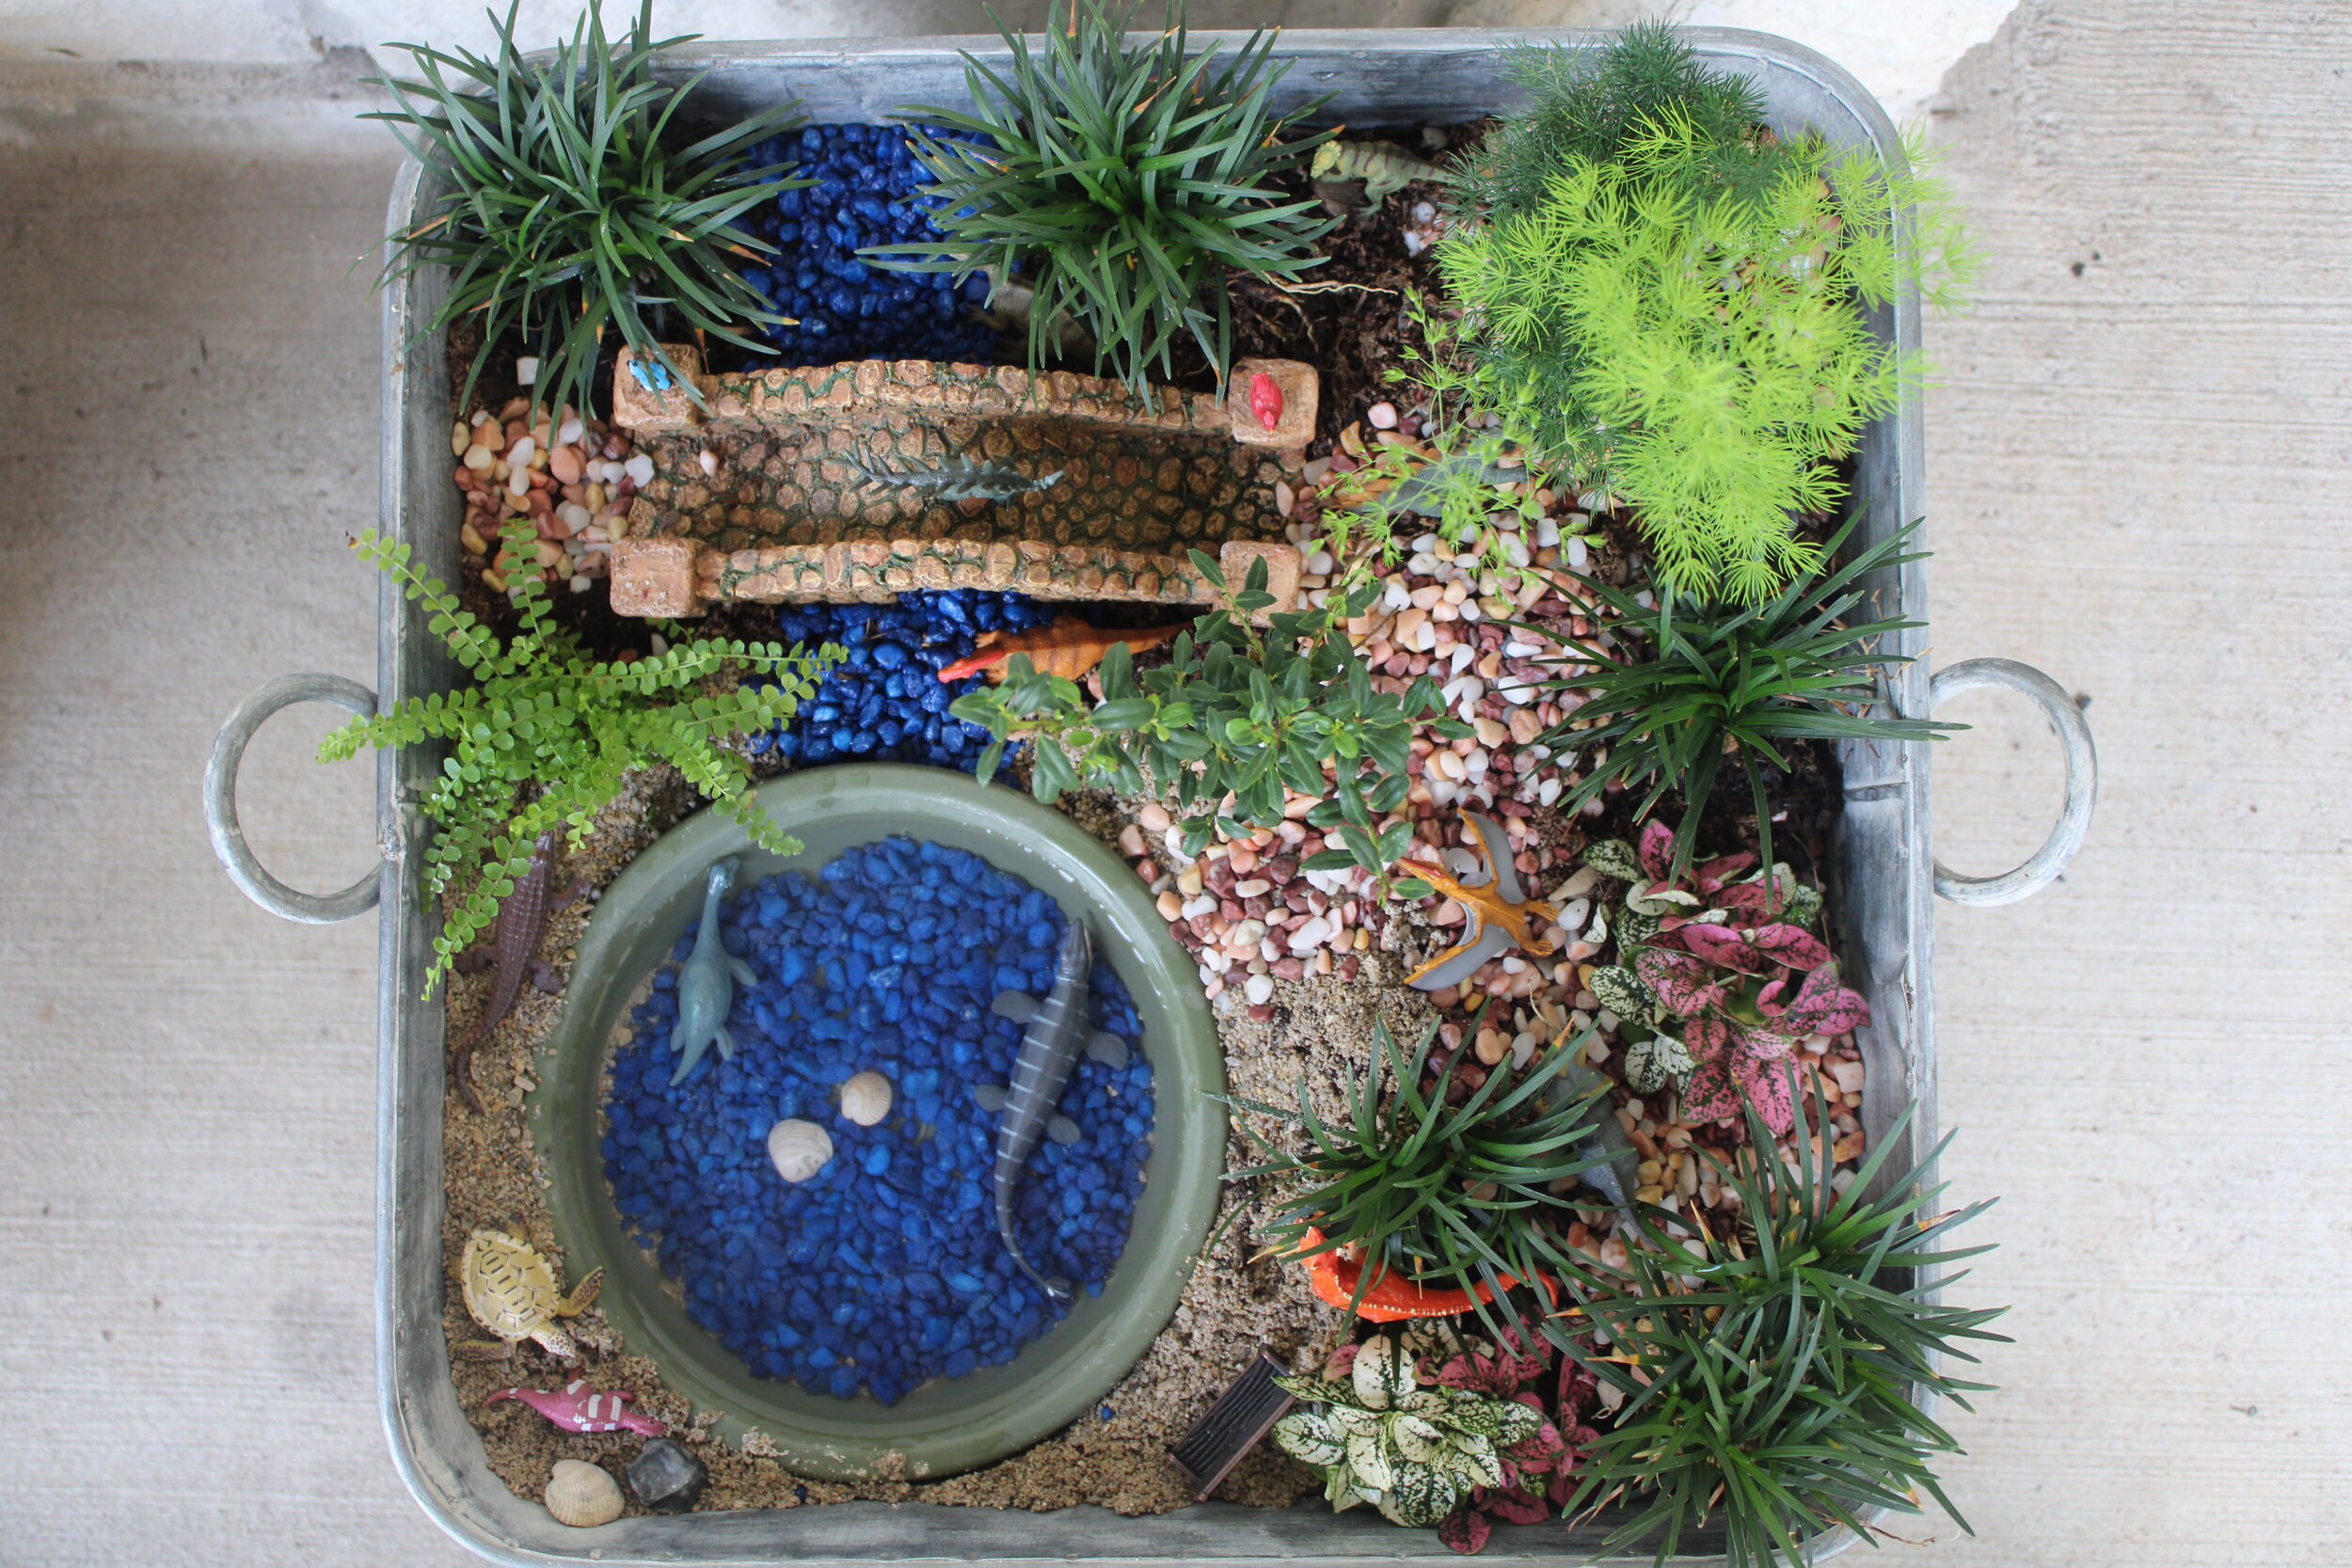
We found a happy medium! Mini dinosaurs with beautiful fresh plants! I wanted to add a worn down house, but my son was not having it. I did order a jurassic park jeep that I may incorporate in there some how. Anyway, if you are a boy mama or your kiddos just love dinosaurs, then this may be it for you! I just wanted to give a quick rundown of what we used:
Container to place the garden in. You can also just do your flower bed around a tree, but I am not that committed smile. We went with a galvanized tub from Michaels (40% off coupon).
Sand
Soil
Decorative rocks - we used river gravel and blue pebbles
Mini fairy structures. We got the bridge from our fav garden store, Enchanted Forest, but Michaels, Amazon, Hobby Lobby, all sell them. Lowes does not, we tried there first. We only got a bridge, small bench, and 2 birds.
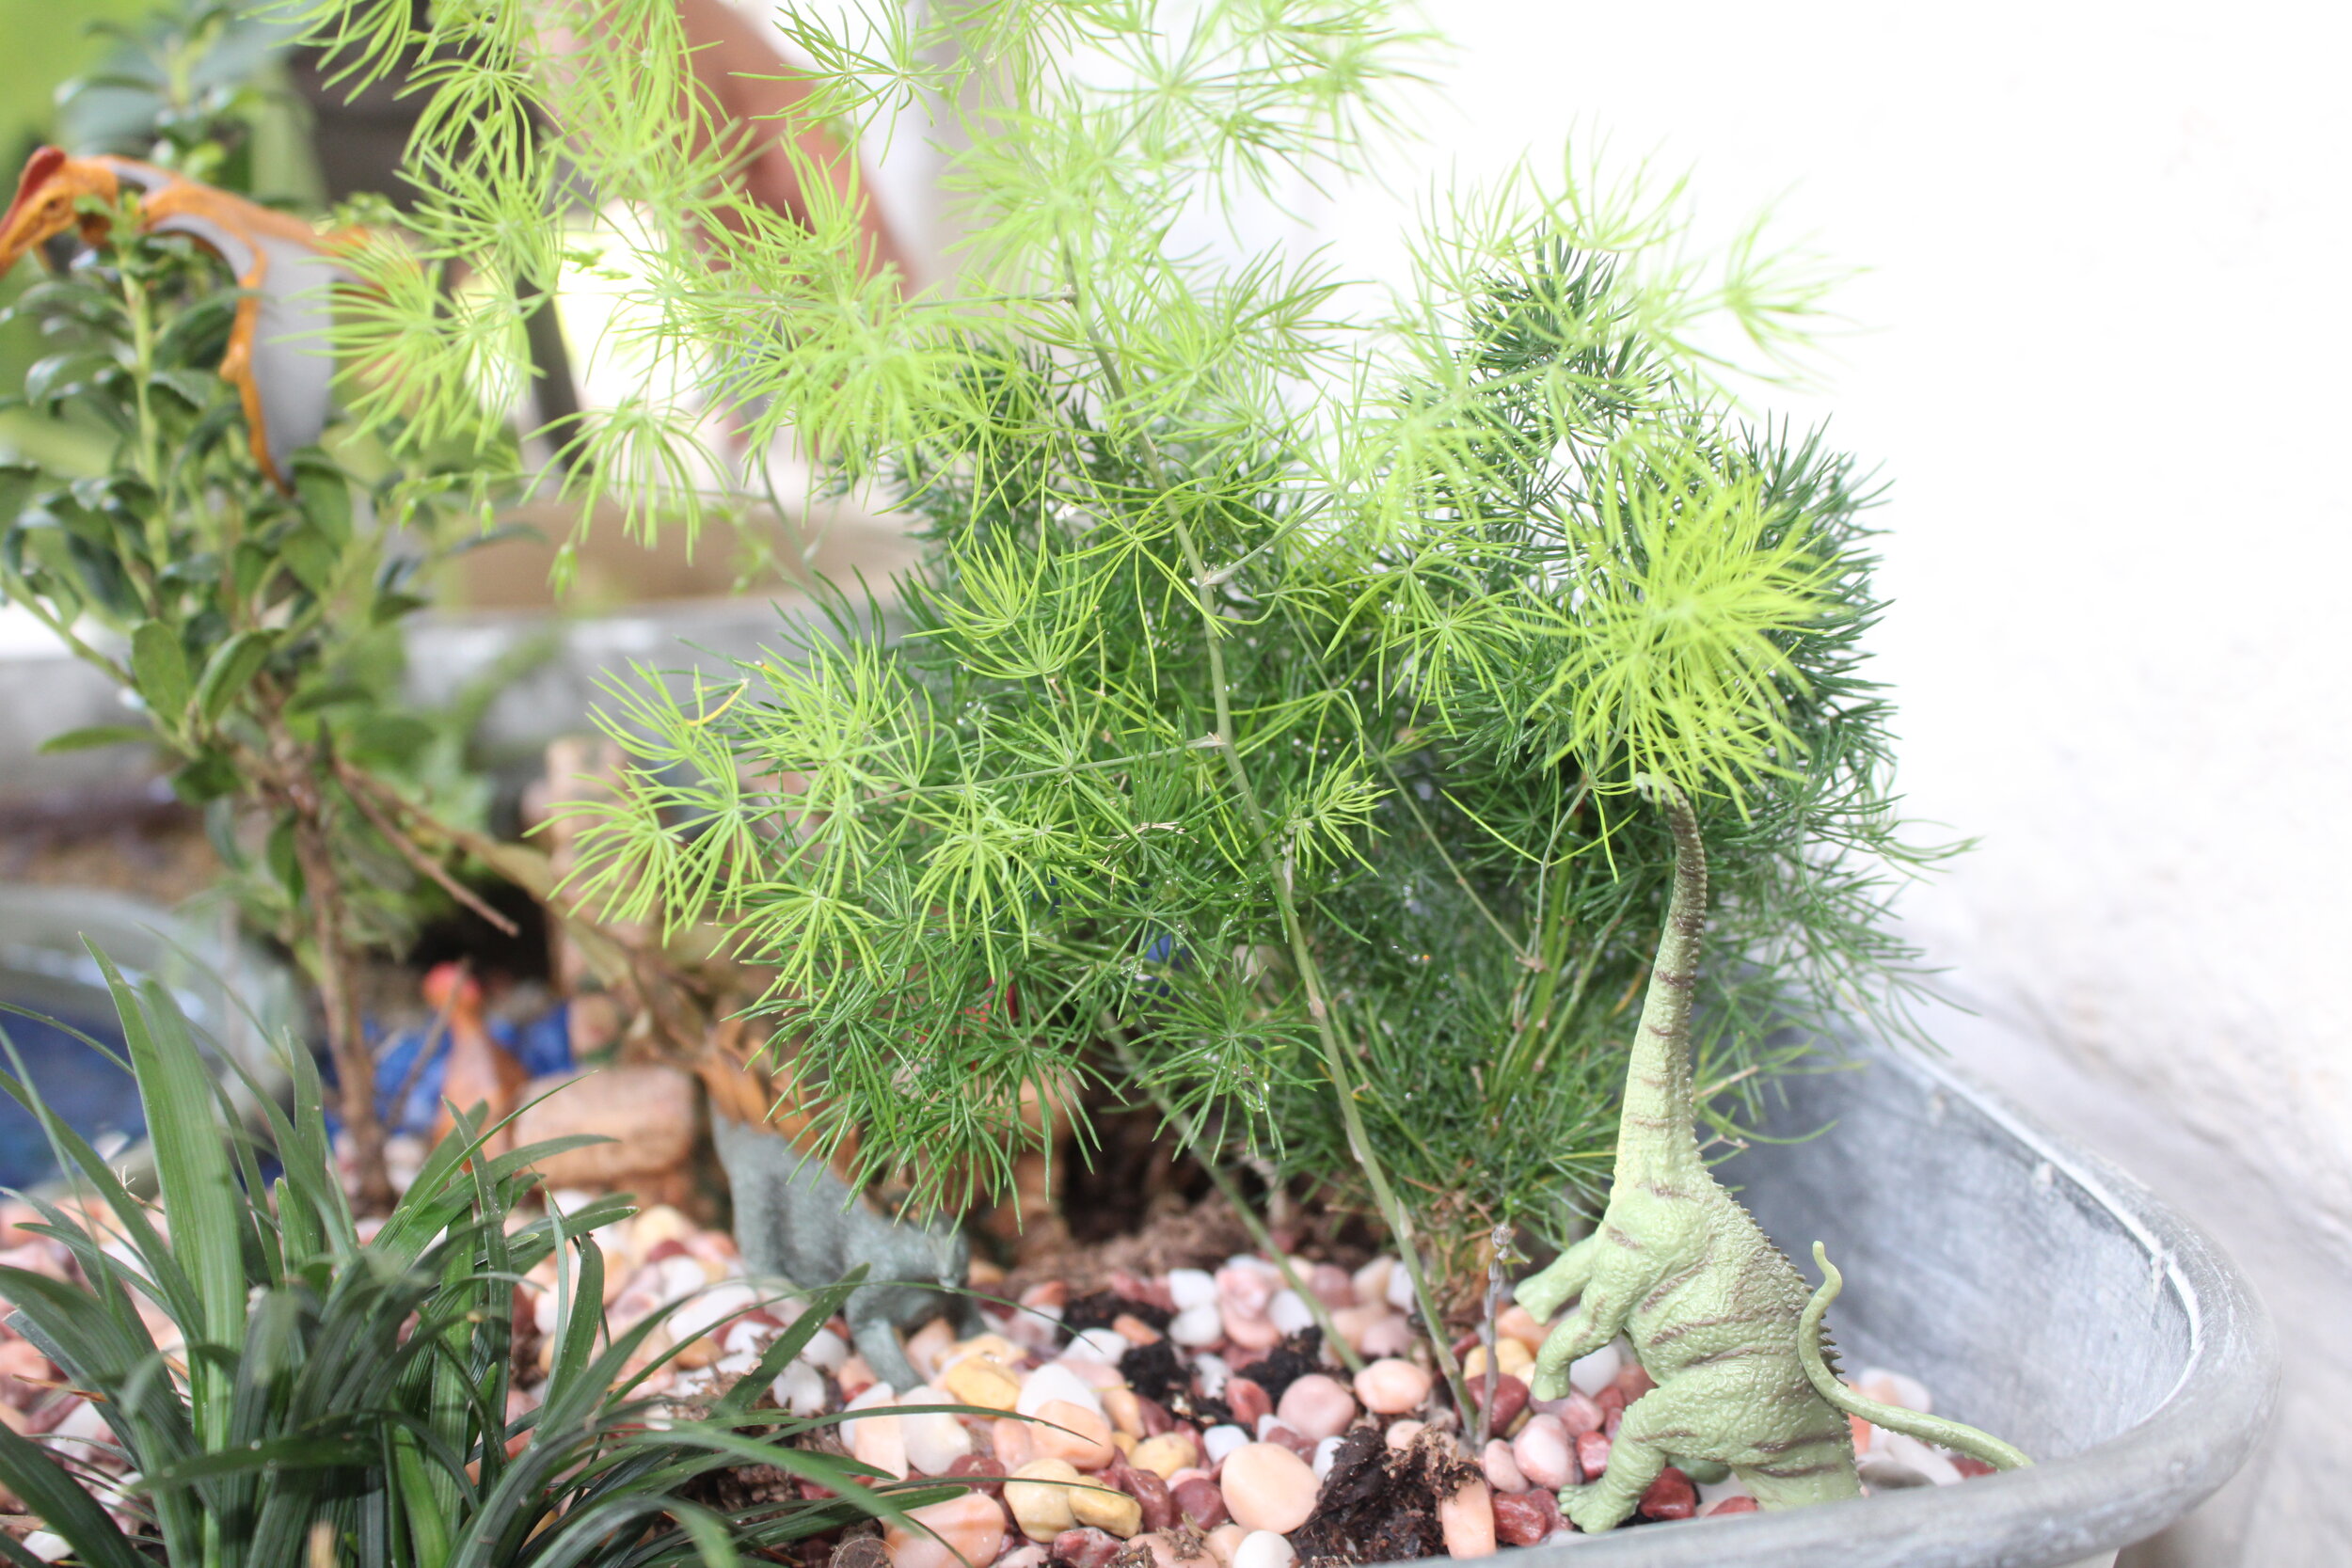
Mini shrubs - We used Ming for the larger tree, 5 containers of dwarf mondo grass, 2 hypoestes phyll (splash rose), a fern, and a bonsai mix.
A small plant saucer for the “water”. We could have purchased a cute pond from Enchanted Forest but the saucer was only $2 and we went to Lowes first before we saw the cute fairy pond.
Mini collectA dinosaurs from Amazon
All items totaled to about $80. The container was the most expensive thing at $45 but like I said, we had a coupon!
Here is how we put it together in 4 simple steps -

1. We added sand to the bottom but you can also just fill the container up with soil.

2. Add the soil. Fill it up, leaving about 6 inches from the top (more or less).
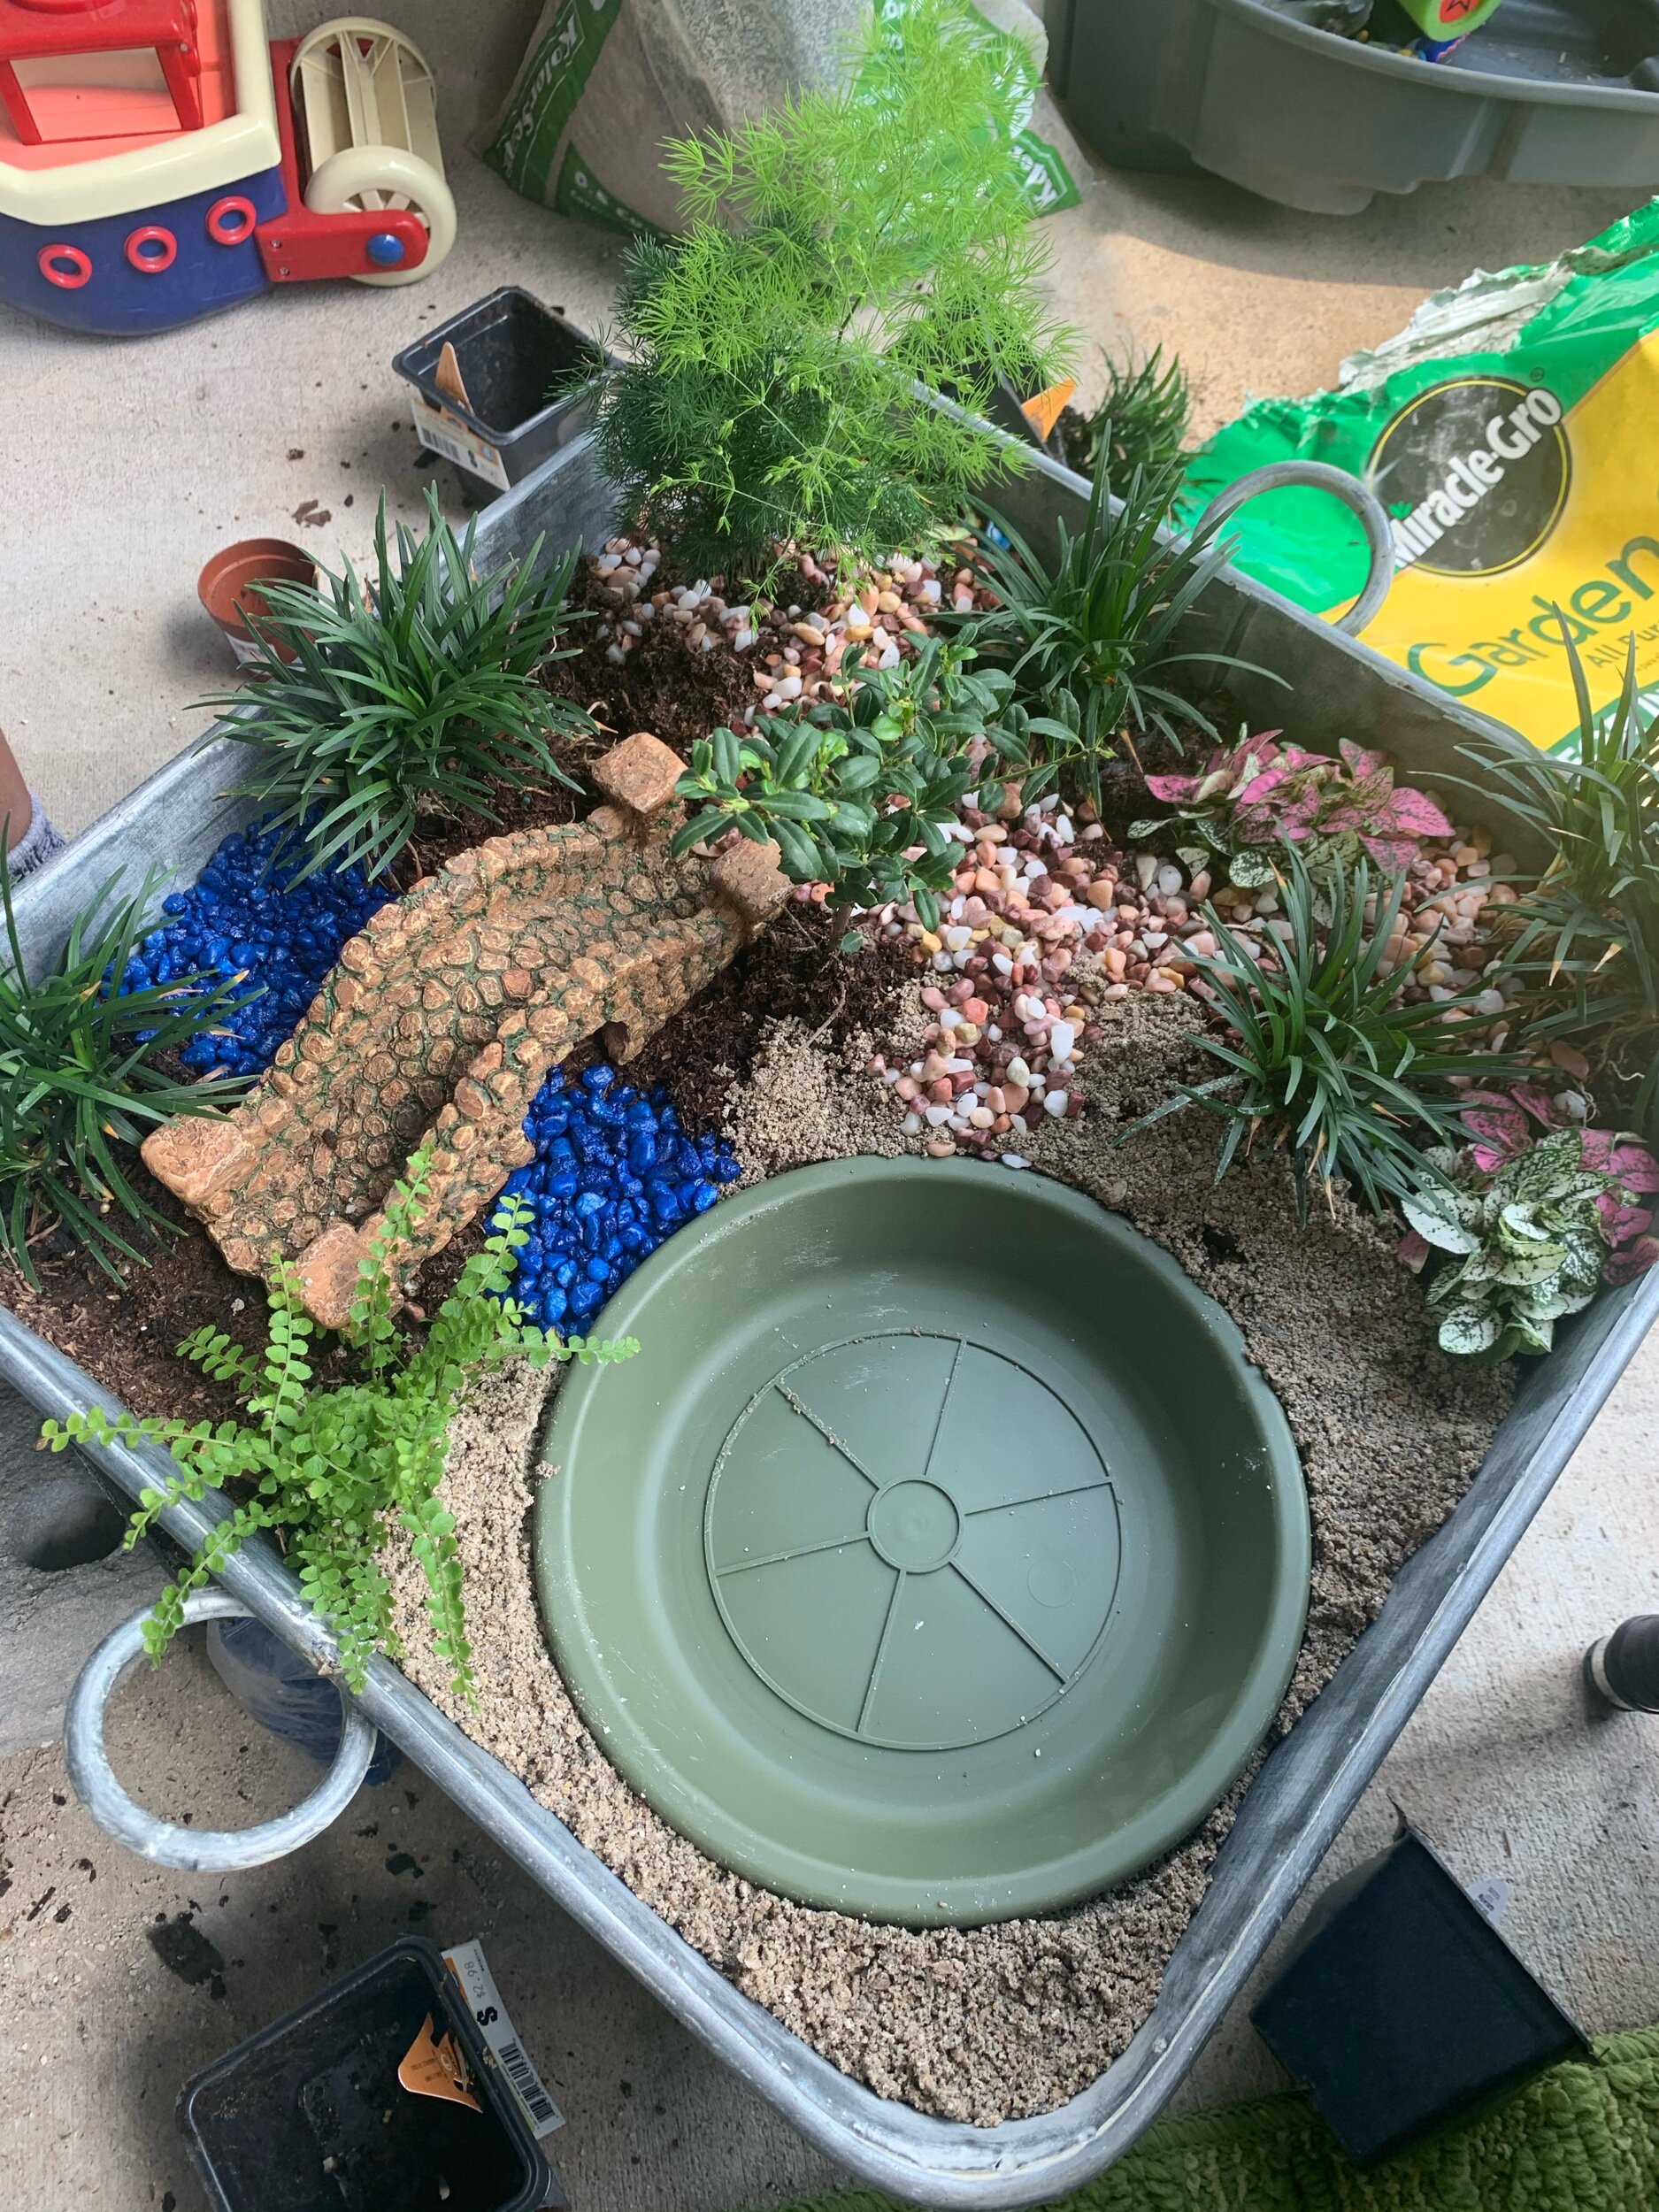
3. (Forgot to take a pic). Place the pieces before planting! Once satisfied, start laying in the plants, and fairy pieces, the saucer, then the sand and rocks!
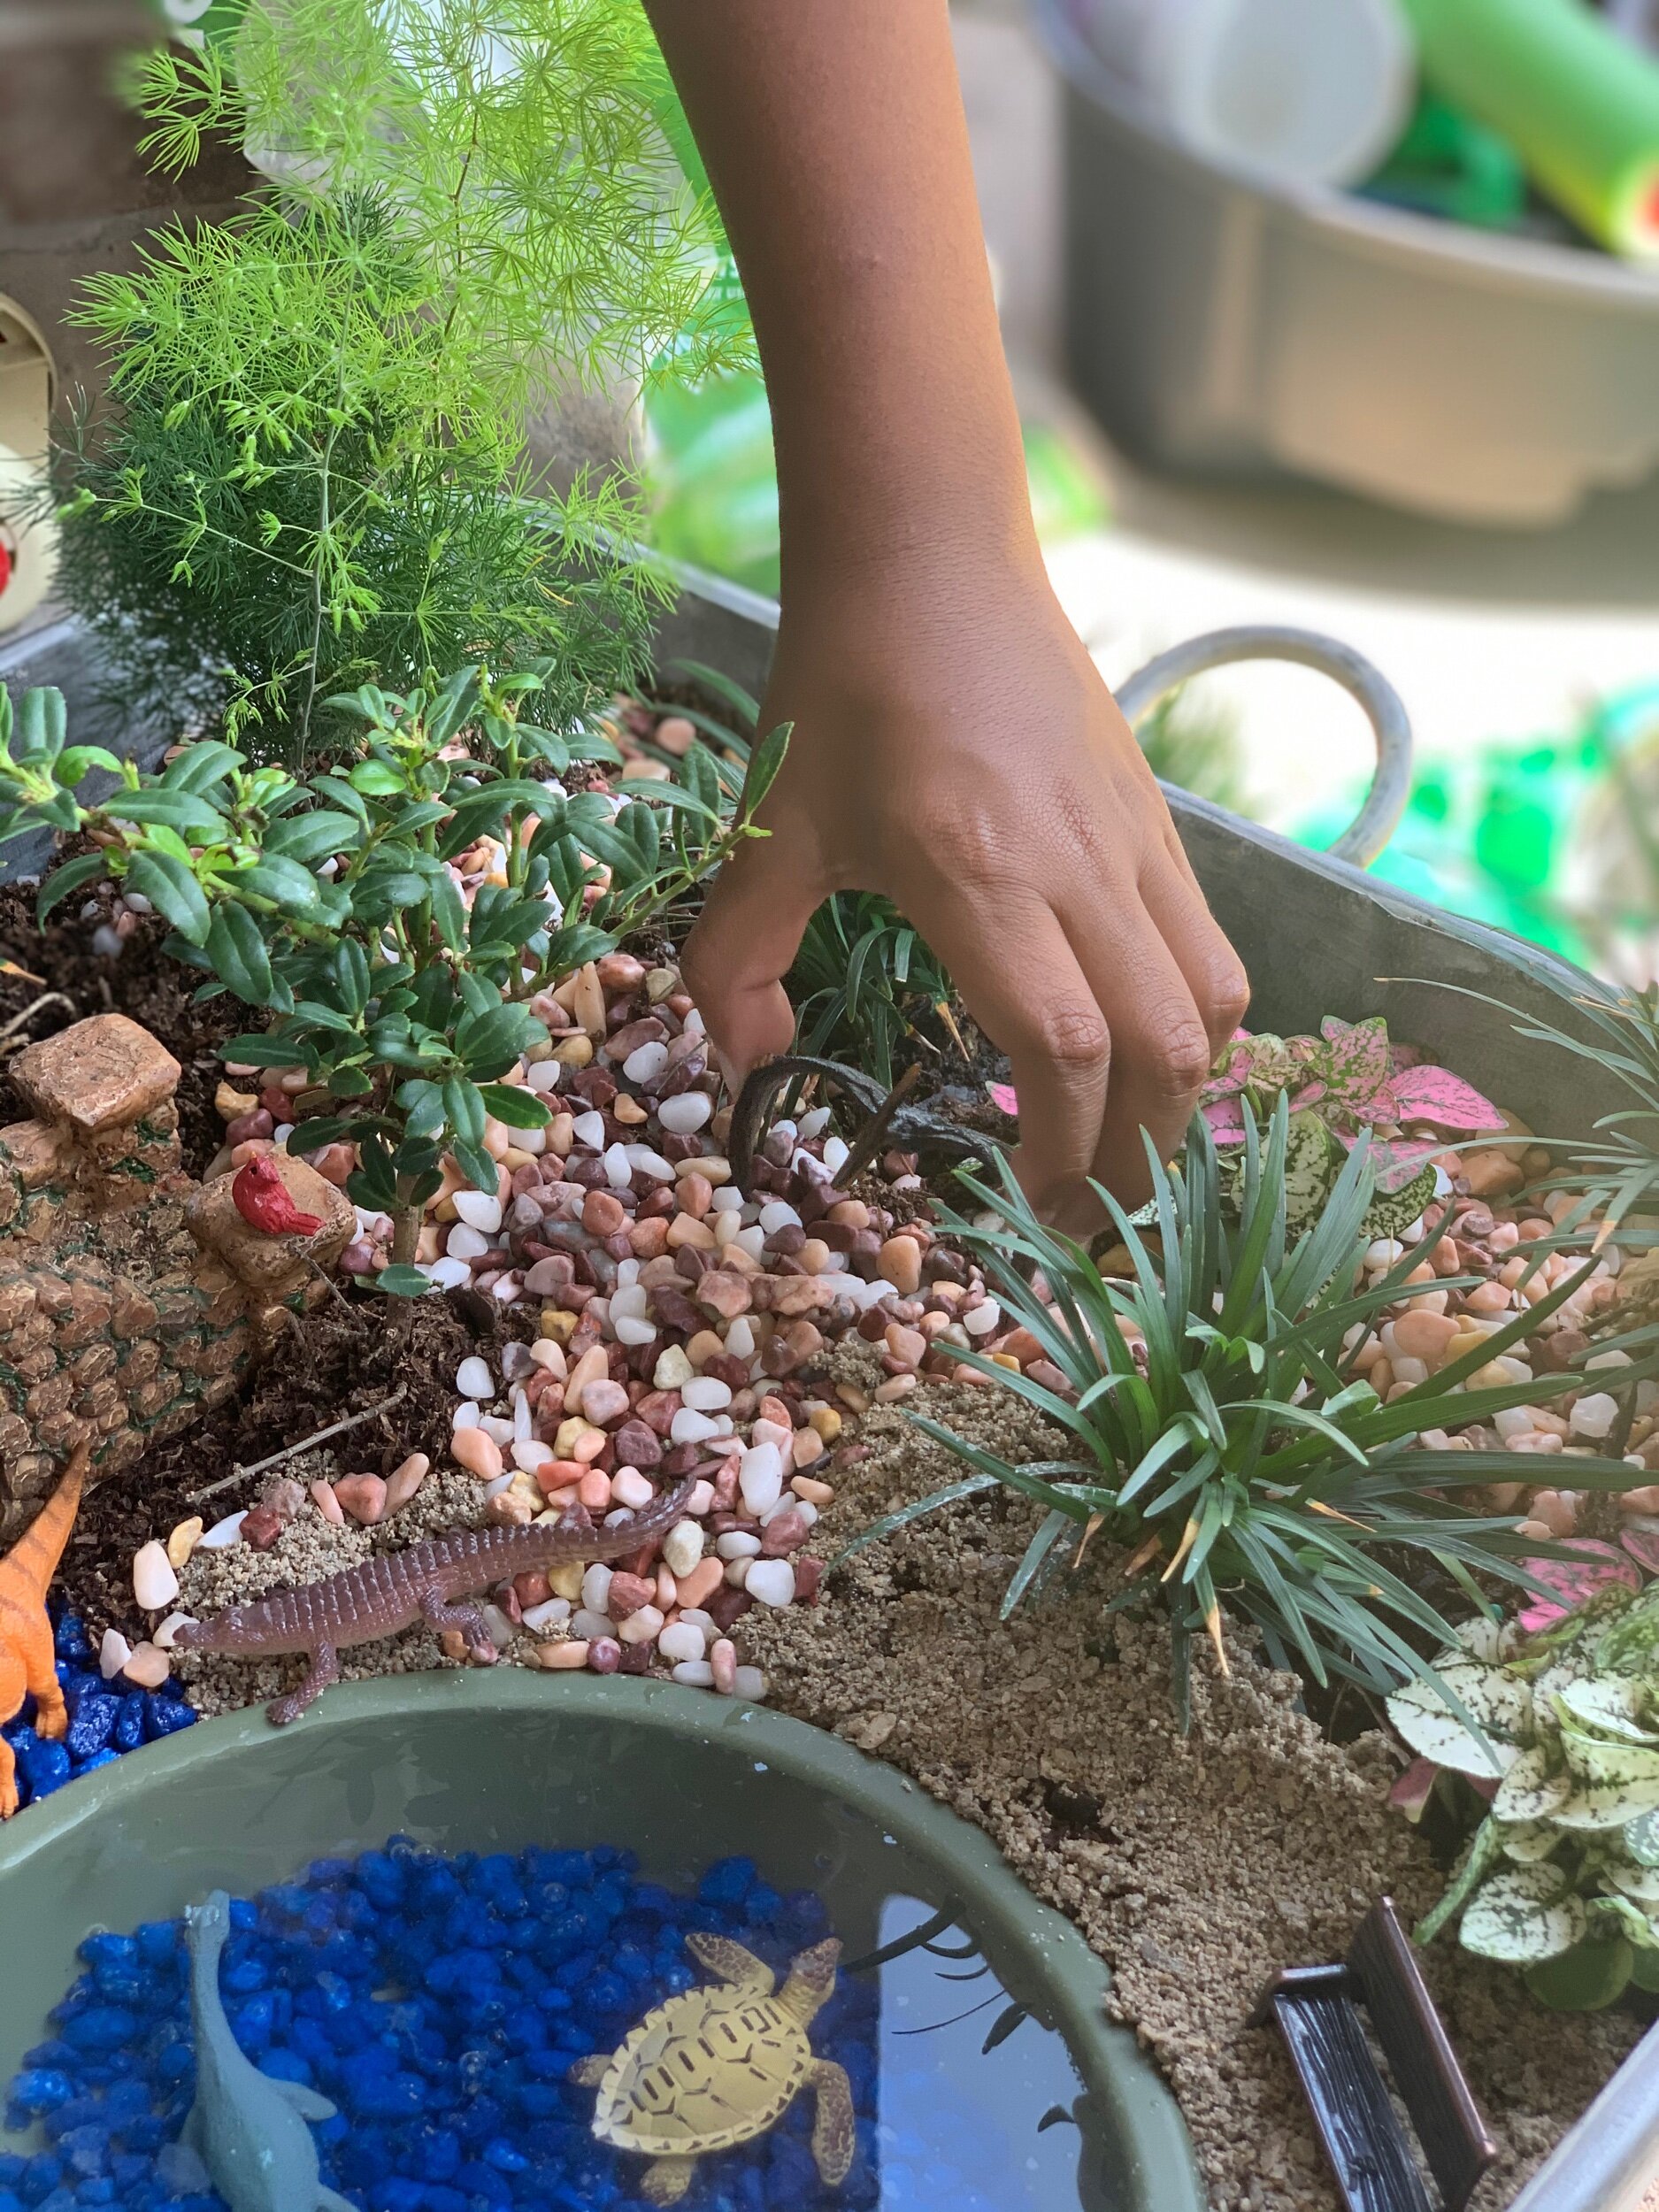
4. My son’s favorite part, adding in the creatures!

You can add some liners to make a clear path but since I did this with my son, we kept it simple. If you are looking for something fun to do with the kiddos, this is an idea!! Not a cheap one, but a fun one that we can hopefully keep alive for a while. He will change out the dinos periodically.
If you have any questions, please comment below! Thanks for reading, XoXo.